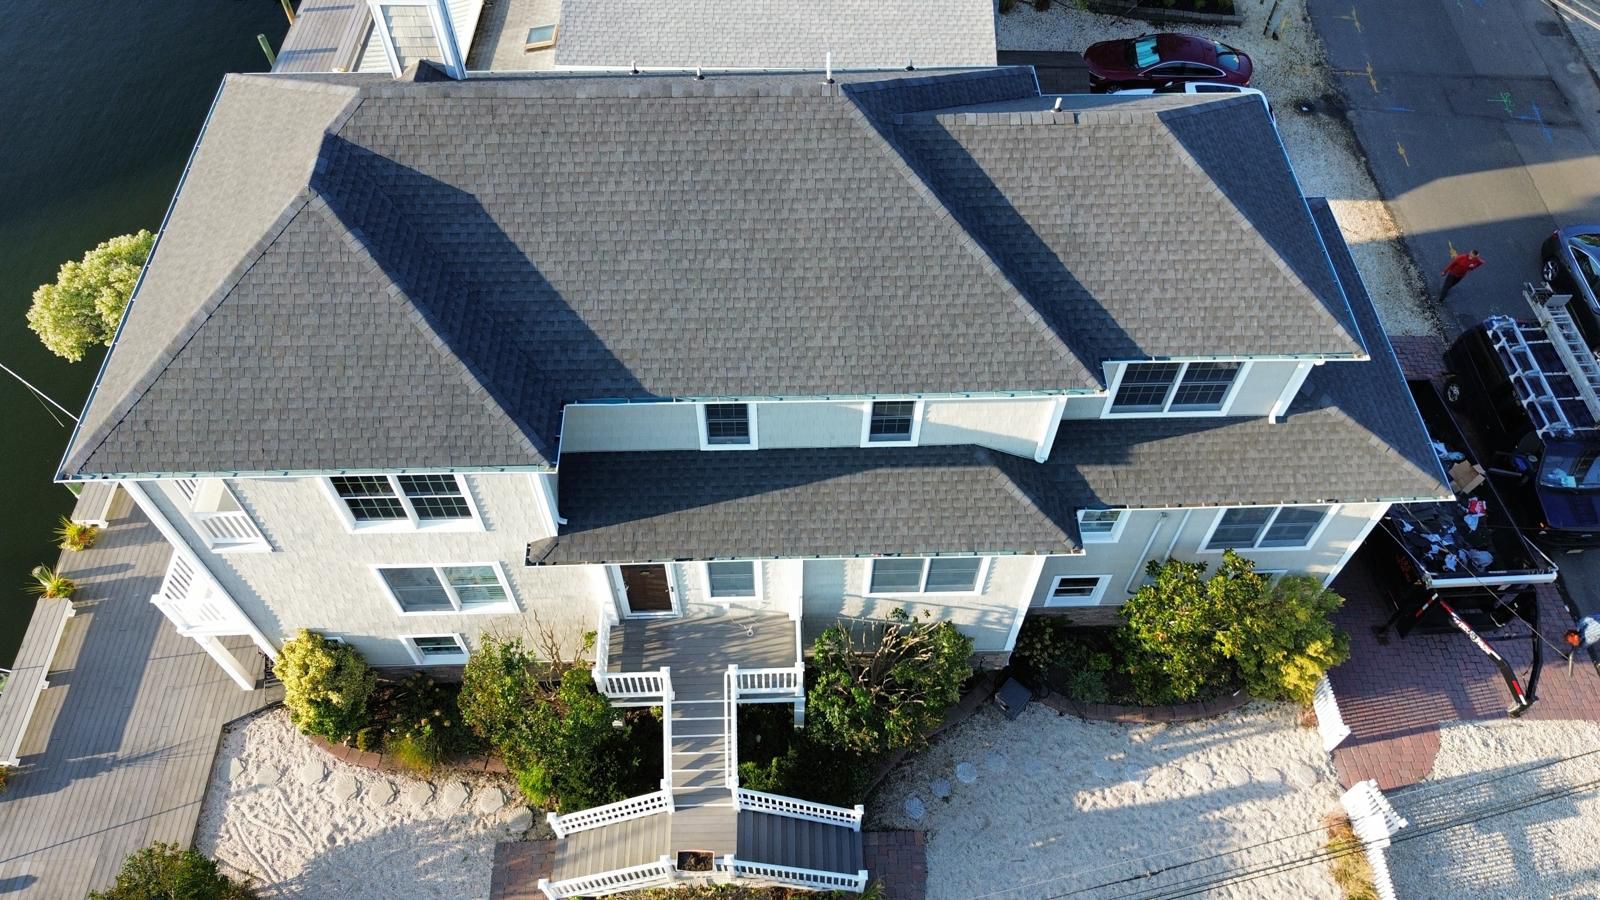
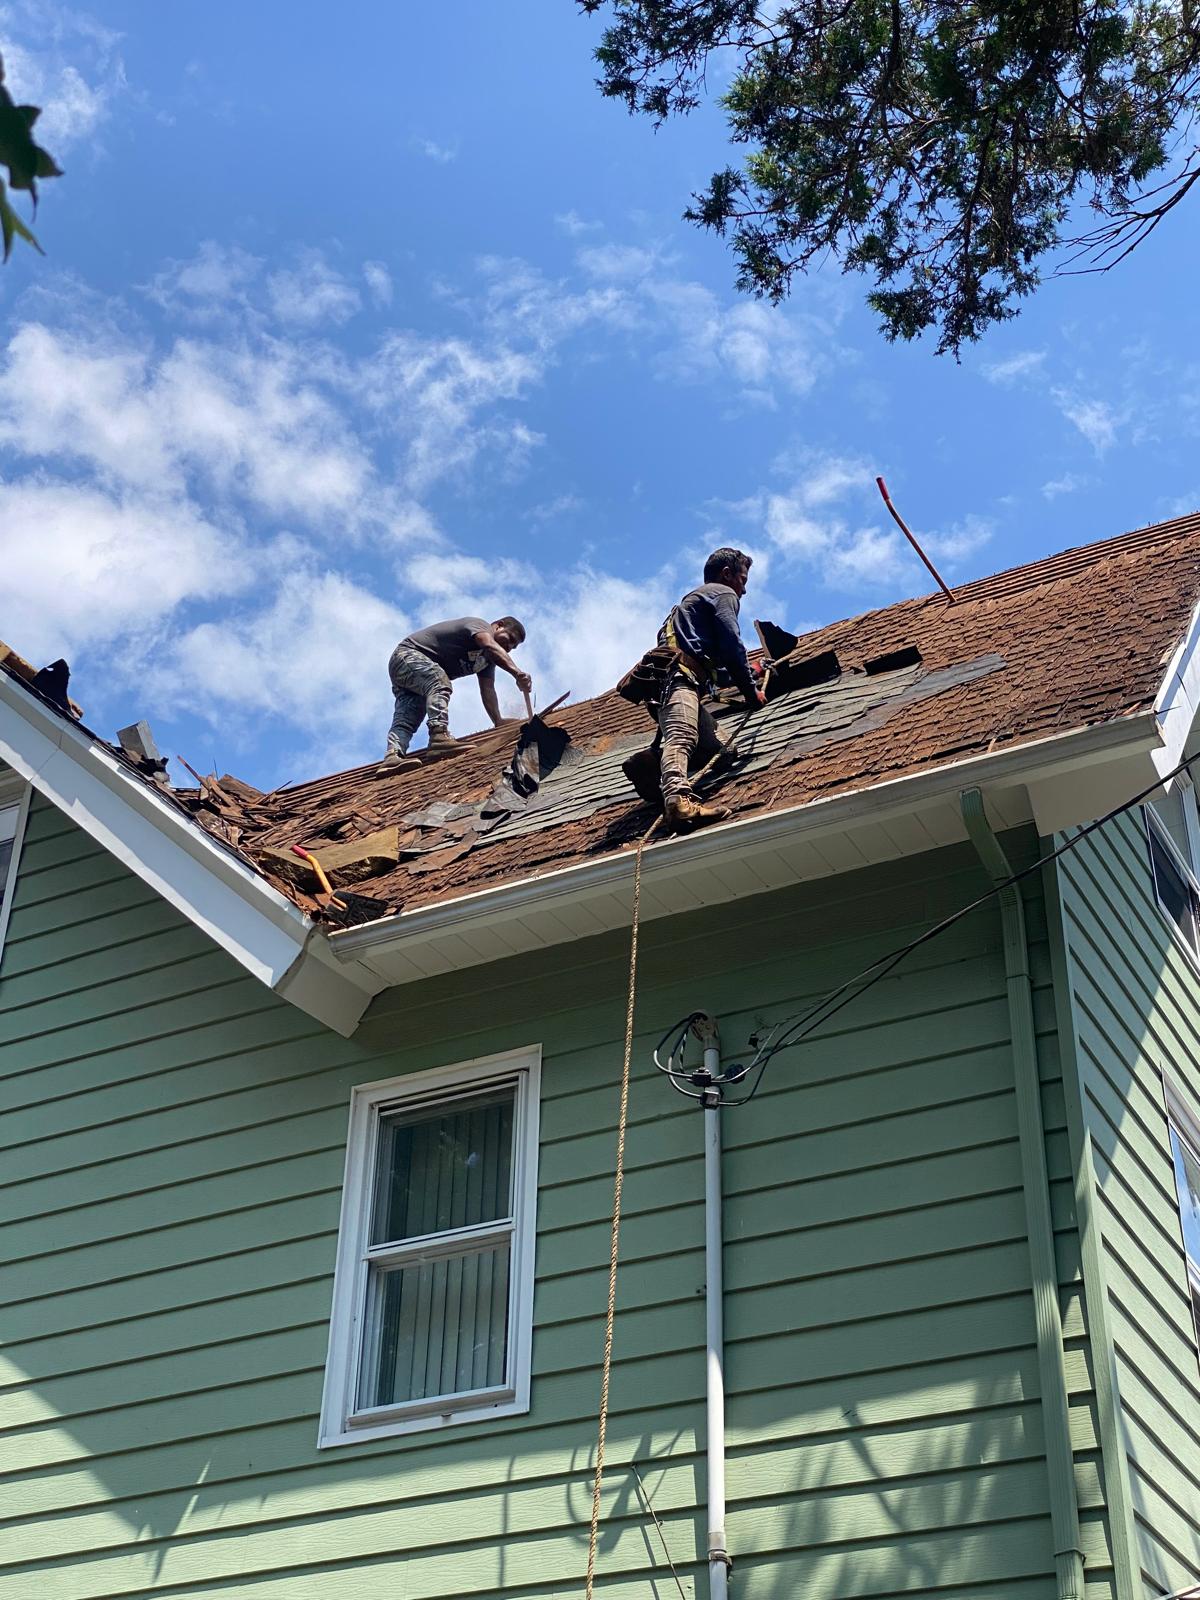
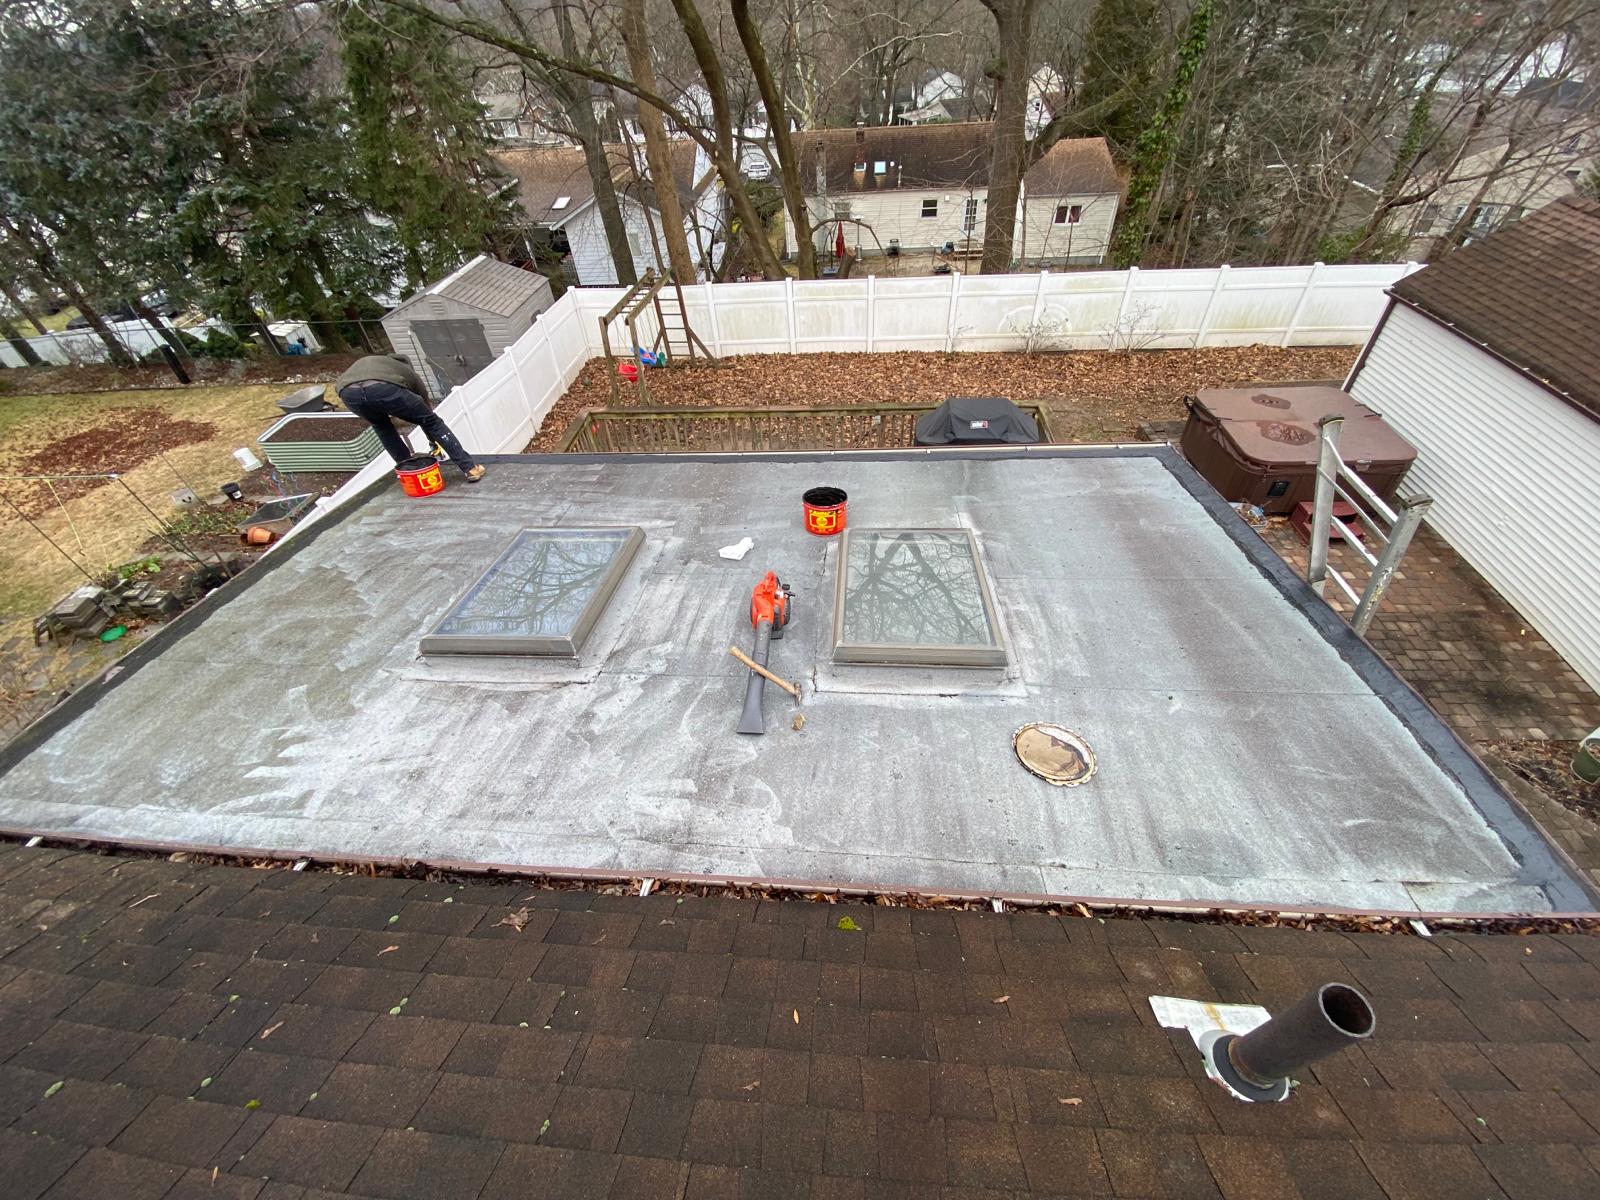
When you’re planning a roof replacement or major roof repair, the estimate is more than a price on paper. It is the first real test of whether a contractor is organized, transparent, and prepared to protect your home or building. A clear estimate helps you understand what work will be done, which materials will be used, how the property will be protected, and what happens if unexpected issues are found after the old roofing is removed. A rushed or confusing estimate can lead to budget surprises, project delays, warranty issues, and repairs that do not solve the real problem. For homeowners and property managers comparing contractors, knowing the common red flags roof estimate shoppers should watch for can make the difference between a smooth project and an expensive headache. Below are practical roofing estimate tips and key Red Flags When Getting a Roof Estimate to help you evaluate proposals with confidence, especially if you are considering roof replacement in New Jersey, where weather, building conditions, and local property types can all affect the scope of work. Why the Roof Estimate Matters So Much A roof estimate should do more than tell you the total cost. It should explain the project. A dependable contractor uses the estimating process to inspect your roof, understand your concerns, identify visible problems, and recommend the right solution. For example, a simple leak may require targeted roof repair if the rest of the roof is in good condition. On the other hand, widespread shingle deterioration, recurring leaks, soft decking, failing flashing, or poor ventilation may point toward a full replacement. The estimate should make that reasoning clear. A strong roofing estimate usually helps answer questions such as: If an estimate leaves you with more questions than answers, that does not automatically mean the contractor is dishonest. But it does mean you should slow down, ask for clarification, and avoid signing until the details are in writing. Red Flag: The Contractor Gives a Price Without a Real Inspection One of the biggest warning signs is a contractor who gives a firm price without properly inspecting the roof. A quick glance from the driveway is rarely enough to understand the condition of a roofing system. A professional inspection may include checking visible roof surfaces, valleys, flashing, gutters, chimney areas, skylights, roof penetrations, attic ventilation, and signs of water intrusion. Depending on the property, the contractor may also look for sagging areas, damaged decking, aging underlayment, or previous poor repairs. If someone offers an unusually confident quote without asking questions or looking carefully, the estimate may be based on guesswork. Guesswork can lead to change orders later, especially if damaged wood, improper flashing, or ventilation problems are discovered after work begins. A better approach is to work with a contractor who explains what they inspected and why the recommended scope makes sense. Red Flag: The Estimate Is Vague or Only Lists a Lump Sum A vague estimate might say something like “replace roof” followed by a single total price. That is not enough detail for a major exterior project. Your estimate should clearly outline what is included. While every contractor formats proposals differently, you should be able to understand the main components of the job. A complete estimate may include: If the proposal does not specify materials, quantities, roof areas, or installation details, you cannot make a fair comparison with another bid. A lower price may simply mean that important items are missing. Red Flag: The Price Is Much Lower Than Every Other Estimate Everyone wants a fair price. However, an estimate that is dramatically lower than the others should be reviewed carefully. Sometimes the cheapest bid excludes key parts of the project, uses lower-quality materials, skips important preparation steps, or relies on unclear labor practices. A low price can also become more expensive later if the contractor adds charges for items that should have been discussed upfront. For example, disposal, flashing, permits, wood replacement, or gutter protection may not be included. That does not mean the highest estimate is always the best. The goal is not to choose the most expensive contractor. The goal is to understand the value behind the number. Ask what is included, what is excluded, and how unexpected conditions are handled. When comparing roof replacement nj estimates, look for the proposal that gives you the clearest scope, strongest communication, appropriate materials, and a realistic price for the work described. Red Flag: High-Pressure Sales Tactics A roof is a major investment. You should not feel pressured to sign immediately, especially if you still have questions. Be cautious if a contractor says the price is only good “right now,” discourages you from getting other estimates, pushes financing before explaining the work, or insists that your roof is in urgent danger without showing evidence. Emergency roof repair situations do happen, but even then, a reputable contractor should explain the immediate concern and the recommended next step. Pressure tactics can make homeowners rush into agreements they do not fully understand. A reliable contractor gives you room to review the estimate, compare options, and ask questions. Red Flag: No Written Warranty Details Roofing warranties can be confusing because there may be both manufacturer warranties and contractor workmanship warranties. The estimate should make clear what warranty coverage is being offered and what the homeowner needs to do to maintain eligibility. A vague promise such as “you’re covered” is not enough. Ask for written details. Important warranty questions include: If a contractor avoids warranty questions or refuses to put warranty terms in writing, that is a serious red flag. Red Flag: Missing Insurance, License, or Business Information Before hiring any exterior contractor, ask for proof of insurance and basic business information. Roofing work involves ladders, tools, debris, and potential property risks. Proper insurance helps protect both the contractor and the property owner. You should also feel comfortable confirming that the company is established, reachable, and operating under a consistent business name. A professional estimate should include company contact information and
Do You Need A Permit For Roofing In NJ?
Whether you are dealing with a sudden leak after a heavy storm or planning a complete exterior upgrade, installing a new roof is a significant investment. Among the decisions regarding shingle colors and contractor selection, one crucial legal question always arises: Do you need a permit for roofing in NJ? Navigating the world of new jersey permits can seem daunting, but understanding the local regulations ensures your project is safe, compliant, and structurally sound. Let’s dive into everything you need to know about securing a nj roofing permit, the costs involved, and the risks of skipping this vital step. Ordinary Maintenance vs. Minor Work: Understanding the Guidelines Under the NJ Department of Community Affairs roofing guidelines , not every roofing job requires a trip to the local building department. It is highly important to understand the difference between roof repair and replacement permits. The state dictates clear NJ Uniform Construction Code roofing exemptions . If you are simply replacing a few blown-off shingles or patching a minor leak, this usually falls under “ordinary maintenance.” Ordinary maintenance does not require a nj building permit. However, if you are tearing off old layers of roofing, replacing plywood decking, or doing a complete installation, the state classifies this as “minor work” or standard construction. Understanding ordinary maintenance vs minor work roofing NJ is the key to knowing your obligations. Simply put: do you need a permit for roofing in nj if you are replacing the whole roof? Yes, almost always. Navigating the Application Process If your project requires approval, you’ll need to follow the residential roofing permit application process NJ . Here are the basic steps to obtain a building permit for a new roof: Many homeowners want to stay updated on their project’s status. If you are wondering in nj how to check for a roofing permit online, many municipal building departments now use the SDL Portal (Spatial Data Logic) or a town-specific digital system where you can search your address to view permit statuses in real-time. Costs and Fees: Budgeting for Your Permit A common question homeowners ask is, how much is a roofing permit in nj? The answer is that the cost of roofing permit in nj varies from town to town. So, exactly how much does a NJ roofing permit cost? Most towns calculate municipal building department permit fees NJ based on the estimated cost of the construction project. For example, a town might charge $30 to $50 for every $1,000 of estimated work, plus a state training fee. On average, you can expect to pay anywhere from $150 to $400 for a standard residential roofing permit nj. Who is Responsible for the Paperwork? Who is responsible for pulling roofing permits in New Jersey? While a homeowner is legally allowed to apply for their own permit, as long as they meet permit requirements nj (often by signing an affidavit stating they are doing the work themselves), it is standard practice for your hired contractor to handle this. When you hire a professional roofer in NJ , they should pull the permit under their company’s name. This ensures they take legal responsibility for the work meeting local building codes. Before signing a contract, always verify NJ home improvement contractor registration requirements . By law, contractors must be registered with the Division of Consumer Affairs to perform roofing services NJ. If you are looking for a reliable partner to handle your project from start to finish, including navigating all roofing permits nj , look no further than Deluxe Construction NJ . They are experts in new jersey roofing and ensure every project is strictly up to code. Town-Specific Rules and Zoning While the Uniform Construction Code provides a statewide standard, you must also pay attention to NJ town specific roofing codes and zoning. Historic districts, HOA guidelines, and specific local ordinances can impact your project. For example, do you need a roofing permit in palmyra nj? Yes, Palmyra, like other local boroughs, enforces the state UCC guidelines but may also have specific requirements for dumpsters on the street or working hours. Always check with your local construction office before a single shingle is removed. The Risks of Skipping the Permit Trying to save a few hundred dollars by dodging the permit process is a dangerous gamble. The penalties for roofing without a permit in NJ are steep. You could face: Furthermore, unpermitted work can haunt you down the road. If a severe storm damages your house, home insurance coverage for unpermitted roof work is often denied by claims adjusters. When it comes time to sell your home, buyers’ inspectors will check municipal records; unpermitted work can delay or completely derail a real estate transaction. The Final Step: Inspections and Approvals Once your contractor finishes the job, the permit process isn’t quite over. The local building department will require a final inspection. The final inspection checklist for NJ roof replacement typically ensures that: Once the inspector is satisfied, the municipality will issue a Certificate of Approval for NJ roofing projects. This certificate is your official proof that the roof was installed safely, legally, and up to state standards. Keep this document safe with your home records! Conclusion Tackling a roof replacement shouldn’t be a stressful legal headache. By understanding the rules, trusting registered professionals, and ensuring your project passes final inspection, you protect your home and your wallet. If you want a seamless experience where every detail—from pulling permits to pounding the final nail—is handled by seasoned experts, visit deluxeconstructionnj.com . With Deluxe Construction NJ, you get unparalleled craftsmanship and peace of mind knowing your roof is built to last and fully compliant with state regulations. Frequently Asked Questions Question: Do I need a permit to work on my roof in New Jersey? Short answer: Usually yes for replacements, no for small repairs. Under the NJ Uniform Construction Code, small fixes like replacing a few shingles or patching a minor leak are “ordinary maintenance” and typically do not require a permit.
Can A City Demand A Roof Replacement In New Jersey
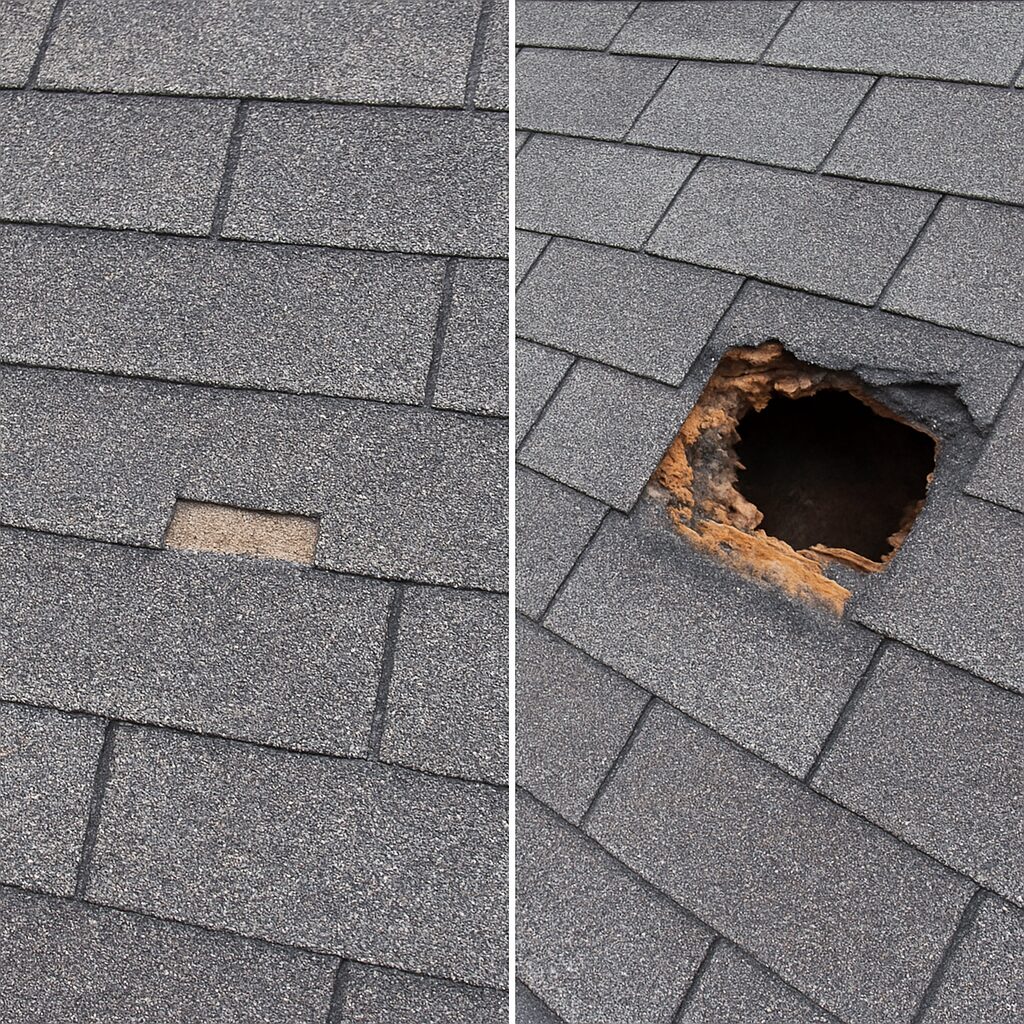
Imagine opening your mailbox to find a formal letter from your local township, stating that your home’s roof is in violation of municipal codes and must be replaced. For many homeowners, this scenario induces immediate panic. You might wonder: Can a city demand a roof replacement in New Jersey? The short answer is yes. Under specific circumstances, usually related to severe safety hazards or extreme blight, your local government absolutely has the legal authority to force you to fix or entirely replace your roof. Understanding how and why a municipality can mandate a home repair is essential for protecting your property, your wallet, and your peace of mind. Let’s dive into the legalities, the process, and what you should do if you find yourself facing a city-mandated roof replacement. Understanding Municipal Power and Property Codes To understand why a city can demand repairs on privately owned property, you first need to understand the hierarchy of building and maintenance codes. In New Jersey, local governments are responsible for ensuring that all buildings within their borders are safe for habitation and do not pose a threat to neighbors or the public. This is overseen through New Jersey property maintenance standards, which dictate the minimum conditions a property must meet to be considered safe and habitable. The Role of Code Enforcement The broad municipal code enforcement officer authority allows local officials to inspect properties—often triggered by neighbor complaints, routine neighborhood surveys, or visible damage from the street. If an officer determines your roof is severely deteriorating, they can issue a citation. While there is sometimes confusion between municipal vs state building codes, the breakdown is generally straightforward: the state sets the standard (like the NJ Uniform Construction Code), but your local municipality enforces property maintenance and dictates when an existing structure has fallen below those legal thresholds. When Does a Repair Become a Mandated Replacement? A code enforcement officer won’t demand a brand-new roof just because your shingles look a bit faded. The city usually steps in only when there are significant safety concerns. Structural Safety and Imminent Hazards If your roof is visibly sagging, missing large sections of shingles after a storm, or actively leaking to the point of structural decay, the city will intervene based on structural integrity public safety standards. If a building official determines the roof is in danger of collapsing, they may issue an imminent hazard building designation. This is the most severe level of violation. The unsafe structure notice consequences that follow can include immediate eviction of the residents (condemning the property) until the structural issues are fully resolved. Legal Criteria for Replacement You might be wondering if you can simply patch the roof to satisfy the city. The roof repair versus replacement legal criteria usually depend on the extent of the damage. According to most building codes, if more than 25% to 30% of the roof’s surface area is damaged or needs to be removed to fix the underlying structure, a patch job is no longer legally permitted. You will be required to pursue a full roof replacement in New Jersey. The Inspection and Permitting Process Once you receive a notice from the city, the clock starts ticking. Navigating the municipal bureaucracy requires specific steps. 1. Professional Assessment The city’s notice will likely mandate a local ordinance roof inspection to formally document the extent of the damage. You will need to hire a licensed professional for a thorough roof inspection nj to assess the decking, underlayment, and structural supports. 2. Obtaining the Right Permits You cannot simply start tearing off shingles. You must navigate the re-roofing permit process NJ. Your contractor will need to submit plans to the township’s building department to prove NJ Uniform Construction Code compliance. 3. Emergency Situations If your roof was destroyed by a severe storm or tree fall, and you have been given an imminent hazard notice, the standard permit waiting period could leave your home exposed. In these cases, your contractor can apply for an emergency construction permit NJ, which expedites the paperwork so that a full roof replacement nj can begin almost immediately to protect the structure. Special Circumstances: Historic Districts If you live in one of New Jersey’s many historic towns—such as Cape May, Morristown, or parts of Montclair—you have an extra layer of bureaucracy to navigate. Homes located in historic districts are subject to strict historical society roofing guidelines NJ. If the city mandates a roof replacement, you cannot simply throw up the cheapest materials available. The historic commission may require you to use specific materials, such as slate, wood shake, or architecturally approved simulated shingles, to maintain the historical aesthetic of the neighborhood. What to Do If You Receive a Municipal Order Ignoring a letter from code enforcement is the worst thing you can do. The fines for roofing violations NJ can accumulate daily, quickly turning into thousands of dollars in liens against your property. Here is an actionable checklist if you receive a mandate: Financial Relief and Insurance Coverage A forced roof replacement is an unexpected and massive expense. Understanding the new jersey roof replacement cost is crucial. While the roof replacement cost new jersey homeowners face varies based on the size of the home, pitch of the roof, and chosen materials, it generally ranges from $7,000 to over $15,000. Does Insurance Cover Mandated Replacements? If your roof’s deterioration was caused by a covered peril (like a sudden windstorm or fallen tree), your standard homeowner’s insurance should cover the new jersey roof replacement. However, if the city demands upgrades to meet current building codes that didn’t exist when your home was built, you will need specific home insurance coverage for mandated repairs, known as “Ordinance or Law Coverage.” Check your policy to see if you have this rider; it can save you thousands in unexpected code-upgrade costs. State and Local Assistance Programs If the replacement is mandated due to age and wear and tear, insurance will not cover it. However, low-income homeowners, veterans, or
How To Calculate Roof Pitch
Calculating roof pitch is a crucial skill for homeowners and builders alike. It determines the steepness of a roof, impacting both function and aesthetics. Understanding roof pitch—and the related roof angle calculation—helps in selecting the right materials and ensuring proper drainage. It also affects the overall design and structural integrity of a building. Whether you’re planning a DIY project or working with professionals, knowing how to calculate roof pitch is essential. This guide will walk you through the process, from measuring to calculating in degrees. If you’ve wondered how to calculate roof pitch in degrees (also phrased as how to calculate the pitch of a roof in degrees or how to calculate a roof pitch in degrees), you’ll find clear steps below. You’ll also learn how to calculate roof area with pitch—often searched as how to calculate area of roof with pitch. By the end, you’ll have the knowledge to tackle any roofing project with confidence. What Is Roof Pitch and Why Does It Matter? Roof pitch refers to the steepness or slope of a roof. It is usually expressed as a ratio of the vertical rise to the horizontal run. For example, a 4/12 pitch means the roof rises four inches for every 12 inches of horizontal distance. Understanding roof pitch is vital for several reasons. A steeper pitch can improve water drainage and help prevent water buildup. It is also crucial in areas prone to heavy snow or rain, as it can reduce the risk of leaks and structural issues. Roof pitch has aesthetic implications as well. It influences the style and visual appeal of a building. Different architectural styles often call for specific roof pitches, impacting the overall design. Here are key aspects affected by roof pitch: Overall, knowing the roof pitch helps in choosing materials, estimating costs, and planning construction efficiently. When determining roof pitch, precise roof slope measurement supports safer design and better material estimates. Tools and Safety Tips for Measuring Roof Pitch Measuring roof pitch requires the right tools to ensure accuracy. Essential tools include a tape measure, a level, and a protractor or angle finder. A smartphone app can also be handy for quick calculations and measurements. These tools help in measuring roof slope accurately. Working on a roof can be dangerous. Safety should always be a top priority when measuring roof pitch. Ensure you wear proper footwear with good grip. It’s advisable to use a harness or secure rope to prevent falls. Additionally, working with a partner adds an extra layer of security. Here are some safety tips to consider: Always prioritize safety to avoid accidents and ensure successful roof measurements. Methods for Measuring Roof Pitch Determining roof pitch can be done using several methods. Depending on accessibility and safety, choose the best method suited to your needs. Each method helps you calculate roof slope and supports determining roof pitch for your project. The most common method is measuring directly from the roof surface. It involves using a level and tape measure to calculate rise over run. This technique is simple and effective for most roofs. Another approach is measuring from the attic. This method is excellent for avoiding outdoor work when the roof is unsafe. It involves calculating the angle internally without stepping onto the roof. List of methods: Each method has its pros and cons, ensuring adaptability for different situations. Choose based on the level of safety and ease of access to your roof Measuring Roof Pitch from the Roof Surface Measuring directly from the roof surface is straightforward. Begin by placing a level horizontally on the roof. Ensure one end touches the roof surface. Next, measure 12 inches (one foot) along the level from where it touches the roof. Measure vertically from that point to the roof. This measurement represents the vertical rise over the 12-inch horizontal run. Steps for surface measurement: This method provides a quick and clear calculation of your roof pitch ratio. Measuring Roof Pitch from the Attic If climbing on the roof isn’t feasible, measure from the attic instead. This indoor method involves less risk and requires minimal tools. Access your attic space to begin the process. Place a level against a rafter in the attic. Ensure the level is horizontal and measure 12 inches along it. From the end point, measure vertically to the bottom of the rafter. This gives you the rise over a fixed horizontal distance. Steps to measure from the attic: This approach is ideal for those prioritizing safety and ease of access. How to Calculate Roof Pitch as a Ratio Calculating roof pitch as a ratio is a simple yet critical step. This ratio reveals the slope by comparing rise to run. Typically, it’s expressed in the form “x/12.” To determine this ratio, measure 12 inches across horizontally. Then, measure the vertical rise from the end of that 12-inch span. The vertical measurement is your numerator in the ratio. Using the basic roof pitch formula—pitch = rise/run—helps standardize your results. For example, if the rise is 6 inches, the pitch is a 6/12. This means for every 12 inches of horizontal distance, the roof rises 6 inches vertically. Steps to calculate: This simple calculation helps in evaluating roof slope for various projects. How to Calculate Roof Pitch in Degrees If you’ve wondered how to calculate roof pitch in degrees or how to calculate the pitch of a roof in degrees, the process uses basic trigonometry. This roof angle calculation translates the pitch ratio into a degree angle. First, calculate the rise over run as a decimal. For example, a 6/12 pitch converts to 0.5. Use a scientific calculator or a trigonometry app to perform this calculation efficiently. Next, apply the formula: degrees = arctan(rise/run). For the example of 6/12 or 0.5, the calculation returns approximately 26.57 degrees. Knowing this angle assists in the selection and installation of materials. This is also how to calculate a roof pitch in degrees with a calculator. Many apps let you quickly calculate roof
Asphalt Shingle Roof Replacement New Jersey
From the sweltering humidity of July afternoons to the brutal freeze-thaw cycles of February snowstorms, your house faces constant weather extremes. According to roofing industry experts, these rapid temperature shifts actively accelerate wear on your home’s exterior, causing materials to expand, contract, and eventually break down. Recognizing exactly when it is time for a full roof replacement in NJ can ultimately save you thousands of dollars in hidden water damage. Many property owners mistakenly view their roof as just a simple lid made of shingles nailed to wood. In reality, a modern shingle roof in NJ functions much more like a high-tech suit of armor. This interconnected system relies on multiple protective layers working flawlessly together—including a waterproof base, proper attic ventilation, and the visible outer shell—to defend your living space against the elements. Financial security is just as important as physical protection during this major investment. Major building material manufacturers note that comprehensive warranties today offer unprecedented peace of mind, often covering materials and labor for decades. However, that long-term safety net only applies if your roof installation in NJ strictly follows precise manufacturer guidelines and local New Jersey building codes. You certainly do not need a contractor’s license to master these crucial concepts. Breaking down how this complete system actually works will help you move quickly from feeling overwhelmed by confusing quotes to having a concrete, confident action plan for your home. 5 Warning Signs Your Shingles Are Failing After a Jersey Winter After months of heavy snow, your New Jersey home might be hiding severe winter wear. Before budgeting for a roof replacement in NJ, you can safely perform a ground-level inspection using just binoculars. A quick walk around the yard reveals the physical signs of storm damage on asphalt shingles before leaks ruin your drywall. Watch for these five warnings: While algae only requires gentle washing, finding clawing edges or cracked metal usually necessitates an asphalt shingle roof replacement in NJ. Once that outer waterproof shell fails, trapped moisture quickly begins rotting the wooden framing beneath. When upgrading your home’s defenses, choose the right materials to ensure longevity. Architectural vs. 3-Tab Shingles: Which Withstands NJ Humidity Better? Protecting your home against Jersey summer humidity and winter nor’easters requires the right shingle style. Contractors quote asphalt roofing in NJ projects by the “square”—a roofing industry term meaning exactly 100 square feet of area. Comparing the cost of architectural shingles vs 3-tab per square quickly explains why modern homeowners abandon older, flat 3-tab designs. Architectural shingles are thicker and feature specialized copper granules for built-in algae-resistance, effectively preventing those ugly dark streaks caused by damp coastal air. These premium shingles act as layered armor for your house. Upgrading to this dimensional style immediately boosts home resale value while offering superior long-term protection: Exploring Energy Star rated roofing materials within these heavy-duty lines can also reduce your summer cooling bills by reflecting solar heat. However, the best shingle is only as strong as the system supporting it. More Than Just Shingles: Why Synthetic Underlayment and Drip Edges Are Non-Negotiable While architectural shingles act as your home’s armor, they aren’t completely waterproof alone. Directly beneath them lies a crucial secondary barrier. Historically, contractors used tar-saturated felt paper, which tears easily and absorbs moisture. Today, reliable NJ roofing solutions use a modern woven fabric. When comparing synthetic underlayment vs felt paper, synthetic options win because they are lighter, totally waterproof, and won’t wrinkle during humid summers. At your roof’s perimeter, water naturally curls backward, threatening your wood decking. To stop this, contractors install metal flashing. Proper drip edge installation physically kicks rainwater away from the wood and into your gutters, preventing expensive rot. Securing these vulnerable edges against coastal winds requires a hidden component called a starter strip. This specialized adhesive row locks down the bottom edge of your visible shingles so they survive severe Nor’easters. Together, these tight layers form a waterproof shell. However, sealing water out also seals heat in, making proper ventilation a critical factor. The ‘Breathing’ Roof: Preventing Ice Dams and Heat Damage in New Jersey A house needs to “breathe” to survive Northeastern temperature swings. Without airflow, trapped heat essentially cooks your shingles from the inside out and skyrockets your summer cooling costs. During a standard asphalt roof replacement, contractors must establish a continuous flow of air. Fresh, cool air enters through soffit vents—the perforated panels under your roof’s overhangs—and naturally pushes hot, stagnant air out through a ridge vent running along the peak. This critical soffit-to-ridge airflow path is the master key to proper attic ventilation and roof longevity. When heavy February snowstorms hit, this breathing mechanism actively defends your home against structural damage. If a poorly ventilated attic runs too warm, it melts the snow resting on your roof, sending water trickling down to the colder overhangs and gutters where it rapidly refreezes. This solid blockage forces newly melted snow to pool backward beneath your shingles rather than draining safely away. Securing total ice dam prevention for New Jersey homes requires an added barrier called an Ice and Water Shield. Think of this membrane as a sticky, self-sealing rubber gasket that grips tightly around every roofing nail, stopping backed-up water from ruining your interior ceilings. These protective layers are crucial, but ensuring they are legally installed is equally important. Navigating NJ Building Permits and Contractor Verification A beautiful, weather-tight roof means little if the installation isn’t legally sound. While navigating New Jersey building permit requirements for roofs seems simple, a contractor asking you to pull the permit is a massive red flag. When homeowners sign that local building application, they legally assume full liability, meaning any future code violations or unexpected job-site accidents fall directly onto their own shoulders instead of the roofing company. Protecting yourself financially requires looking past a friendly sales pitch to demand proof of professional legitimacy. Before allowing anyone on ladders, execute a strict NJ Consumer Affairs roofing contractor verification. Your pre-hire vetting checklist must include three non-negotiable items:
Does Buildings Insurance Cover Roof Repairs In New Jersey
Navigating the complexities of buildings insurance can be daunting, especially when it comes to roof repairs in New Jersey. Homeowners often wonder: does buildings insurance cover roof repairs in New Jersey? Understanding your roof repair coverage early can prevent last-minute stress. Understanding your insurance policy is crucial. It helps you know what is covered and what isn’t under roof repair insurance and broader roof damage insurance. Roof damage can be costly, so knowing your coverage is vital when assessing insurance for roofs. In New Jersey, weather can be unpredictable. Storms, heavy snow, and hurricanes can cause significant roof damage. New Jersey roof insurance can provide a safety net in these situations. However, not all damage is covered. Wear and tear or poor maintenance are usually excluded. Under building insurance NJ policies, it’s important to know these exclusions to avoid surprises. Filing a claim requires careful documentation. Photos and repair estimates are essential for NJ roof repairs. This ensures a smoother claims process. Regular roof maintenance is key. It helps prevent damage and supports your insurance claims. Keeping records of repairs is also beneficial. Consulting with an insurance agent can clarify coverage details. They can help ensure you have adequate protection under NJ property insurance. Understanding your policy can save you time and money. Understanding Buildings Insurance for Roof Repairs in New Jersey Buildings insurance is vital for homeowners. It protects against unexpected events like storms and fires. In New Jersey, this coverage can include roof repairs—many homeowners researching buildings insurance roof repairs New Jersey seek clarity on when coverage applies. Coverage varies between policies. It’s essential to know what your specific policy covers. Roof repairs might be included under certain conditions, so check how your roof repair coverage is defined. Typically, insurance covers damage from perils. This includes events like windstorms, fires, or vandalism. However, standard wear and tear usually is not covered. To understand your coverage, check your policy details. Look for specific language about roof repair coverage. This will help you know what to expect if damage occurs. Review your policy with these key points in mind: In summary, knowing your insurance policy is critical. It ensures you are prepared for potential roof damages in New Jersey. Understanding these details can make all the difference when you need to file a claim for roof repair New Jersey homeowners may face after severe weather. What Types of Roof Damage Are Covered by Buildings Insurance? Buildings insurance usually covers specific types of roof damage. Recognizing these types can save you time and stress. Let’s delve into what’s typically included. Natural disasters often result in covered claims. Hurricanes, hail, or heavy snow cause significant damage that is normally insurable. New Jersey’s weather patterns make this coverage crucial. Another common coverage is for fire damage. Fires can destroy or severely damage roofs. Insurance typically assists with rebuilding or repairs. Theft or vandalism can also lead to roof damage. This damage is typically covered by insurance. Such situations, though less common, should not be overlooked. Despite these coverages, there are exclusions. Maintenance issues usually aren’t covered. Understanding these differences is essential for effective coverage. Common covered roof damages include: Review your policy to confirm these coverages. Speak with your insurer if you’re unsure. Proper understanding ensures you’re adequately prepared for New Jersey’s unpredictable weather. This knowledge helps maintain your property’s safety and integrity. Common Exclusions: What Roof Repairs Are Not Covered? Not all roof repairs fall under buildings insurance. Understanding exclusions is key. Coverage typically excludes damages not caused by sudden events. Routine wear and tear usually isn’t covered. As roofs age, they naturally degrade. Insurance does not pay for repairs from neglect or lack of maintenance. Damage from pests is also commonly excluded. Birds, insects, or rodents can wreak havoc. These damages typically require separate coverage or out-of-pocket repairs. Improper installation or poor workmanship may not be insurable either. Faulty construction can lead to significant problems. Insurance policies often exclude these situations. Common exclusions from roof repair coverage include: It’s crucial to maintain your roof and address minor issues quickly. Regular inspections help catch potential problems early. This proactive approach can prevent excluded damages and ensure your roof remains insurable. Actual Cash Value vs. Replacement Cost: How Your Roof Claim Is Calculated When filing a roof claim, your policy’s valuation method is critical. Insurers typically use either actual cash value or replacement cost. Understanding these can impact your reimbursement and how your roof repair insurance responds. Actual cash value (ACV) considers the roof’s age and depreciation. As roofs age, their ACV decreases. You receive a lesser payout due to depreciation. Replacement cost pays for a new roof, ignoring depreciation. It covers full replacement expenses, offering significant financial protection. Policies with this coverage are generally costlier. To fully understand your policy, review its terms. Key differences between ACV and replacement cost include: Choosing the right coverage affects your out-of-pocket costs. Speak to your insurance agent to decide which suits your needs best. This ensures you’re well-prepared in case of roof damage. The Roof Insurance Claims Process in New Jersey: Step-by-Step Filing a roof insurance claim in New Jersey requires careful preparation. The process involves several critical steps to ensure successful reimbursement. Understanding each phase can significantly simplify your experience. First, assess the damage and ensure your safety. Prioritize fixing hazardous conditions. Once safe, start the claims process with your insurer. Notify your insurance company about the roof damage promptly. Timely reporting is essential to meet policy deadlines. Provide comprehensive details about the incident to your insurer. Next, document the damage extensively. Take clear photographs from multiple angles. These images will serve as proof for your claim and expedite processing. Compile a detailed list of affected areas and potential causes. Coordinate with an experienced roofing contractor. Obtain an estimate for the repair or replacement work. This estimate will support your insurance claim and help determine coverage. Submit all required documentation to your insurer. This includes photos, estimates, and incident reports. Keeping these organized
How Snow and Ice Impact Flat Commercial Roofs
Most of us look at a snow-covered building and see a picturesque winter wonderland. Structural engineers, however, see thousands of pounds of invisible pressure pushing down from above. According to building experts, your roof constantly supports the weight of its own materials—known as the “dead load”—but heavy winter storms introduce a massive, unpredictable “live load” of dense snow that can test a building’s limits. Unlike sloped residential roofs that easily shed snow from their shingles, commercial systems face a much harsher reality. Flat roofs aren’t actually perfectly level; they rely on a slight pitch to direct water across a continuous, rubber-like membrane toward internal drains. In practice, freezing weather turns this design into a giant shallow bowl that traps heavy ice, quickly transforming a minor winter storm into a major structural liability. Recognizing how snow and ice impact flat commercial roofs serves as your best defense against unexpected financial disaster. By adopting a logic-based approach to winter roof maintenance, you can spot hidden stress signs early. Ultimately, proactive commercial roof care simply demands knowing when that seasonal white blanket crosses the line from a temporary nuisance to an outright emergency. Why Your ‘Flat’ Roof Isn’t Actually Flat—And How Winter Breaks the System Despite the name, commercial “flat” roofs actually have a slight, intentional tilt. A critical 1/4-inch slope per foot is required to guide melting snow toward an exit, acting much like a gently tilted shower floor. This subtle pitch prevents “ponding water”—pools of moisture that rapidly degrade roofing seams and invite leaks. Properly managing moisture escape routes serves as your first line of defense against structural damage. Typical commercial flat roof drainage systems for winter rely on three main exit routes: The worst ice accumulation effects occur when a trickle of daytime melt freezes solid overnight right across these specific exits. Once an ice dam forms, trapped water backs up into a massive, expanding frozen pool. Consequently, clearing blocked scuppers and internal drains before a freeze is vital to your roof’s survival. When trapped water turns to solid ice, it fundamentally alters structural stress, bringing us to the “shelf” analogy and calculating the massive weight of “invisible” snow. The ‘Shelf’ Analogy: Calculating the Massive Weight of ‘Invisible’ Snow Looking up at a winter snowfall, it is easy to underestimate the crushing force resting above your ceiling. A foot of dry snow adds roughly three pounds per square foot (PSF) to your building, but wet snow easily doubles that burden. More alarming is the snow-to-ice weight ratio: just one inch of solid ice weighs the same as a foot of fresh snow, rapidly pushing older structures toward their maximum commercial roof snow load capacity. Think of your roof frame like a sturdy wooden bookshelf. It holds a row of heavy books effortlessly, but if you completely soak those books in water, the wood eventually sags in the middle. Engineers call this downward bending “deflection,” which is a natural response to heavy weight. On a commercial flat roof, however, this subtle bowing triggers a dangerous chain reaction. As the frame sags, it forms a wide depression that traps even more freezing rain and meltwater, creating a self-feeding cycle known as the “bowl effect.” This concentrated, escalating burden severely threatens the structural integrity of commercial roofing under ice. If left unmanaged by professionals, this localized stress becomes a primary driver of sudden commercial roof collapses from excessive weight. Beyond these massive structural threats, trapped freezing water launches a quieter attack on your building’s outer skin. As heavy moisture freezes and thaws overnight, it violently forces the protective membrane to stretch. This constant temperature-driven expansion leads directly to our next unseen threat: thermal shock and the “soda can” effect that causes your roof seams to split. Thermal Shock and the ‘Soda Can’ Effect: Why Your Roof Seams Split We’ve all seen a forgotten soda can burst in the freezer. That same physics threatens your building when trapped moisture turns to ice. Daytime sun melts snow into microscopic surface cracks, while nighttime temperatures cause that water to freeze and forcefully expand. This extreme temperature shift—called “thermal shock”—is incredibly destructive when dealing with ponding water freezing on TPO membranes. Instead of sitting harmlessly on the surface, the expanding ice acts as a physical wedge prying your waterproof seams apart. When this ice finally thaws, it leaves behind permanently stretched seams and soaked flat roof insulation beneath the surface. These newly widened gaps create direct, immediate paths for meltwater to enter your building, explaining why sudden roof leaks usually erupt on the first warm day rather than during the actual blizzard. Catching this invisible damage early prevents minor material stretching from becoming an expensive interior repair. To accurately assess the impact of freeze-thaw cycles on roof flashings, monitor your property for these four exterior clues before moving inside to check for deeper structural strain: The ‘Sticking Door’ Test: 5 Early Warning Signs of Snow-Load Damage Have you noticed interior doors sticking lately? A door that suddenly refuses to latch is often your building’s first cry for help under massive winter weight. When a flat roof holds thousands of pounds of snow, support beams subtly bow downward—a process called deflection. This pressure transfers directly into your walls, warping door frames far below the roofline. Learning how to identify roof snow accumulation damage before a collapse means trusting your senses. You can spot these five structural warning signs without ever climbing a ladder: Ignoring these subtle alarms often guarantees the need for expensive emergency roof repairs after heavy snowfall. Once a building audibly groans under extreme strain, the window for safe intervention shrinks quickly. The immediate next step isn’t grabbing a shovel yourself, but evaluating safe mitigation options like manual removal or chemical de-icing. Professional Prevention: Manual Removal vs. Chemical De-Icing When a building shows stress, the instinct is to eliminate the weight immediately. However, one of the most crucial snow removal tips is hiring crews trained in professional snow raking rather than sending staff onto a
How much does it typically cost to repair a roof leak
You hear the steady drip-drip-drip against the attic floor, and your first thought isn’t about the water itself—it’s about your bank account. That rhythmic sound often triggers a specific kind of homeowner panic, spiraling into visions of drained savings and massive construction crews taking over your driveway. But panic rarely leads to smart financial decisions. Instead of worrying about a worst-case scenario, the best way to regain control is to understand the financial reality before you ever pick up the phone to call a pro. Roof repair pricing often feels like a secret known only to contractors, leaving many homeowners to wonder exactly how much does it typically cost to repair a roof leak? While every house presents unique challenges, industry data reveals that most minor repairs fall between $300 and $1,500. This range serves as a critical anchor for your budget. Knowing this baseline immediately shifts your perspective from fearing a total replacement to managing a routine maintenance expense. Unless the damage is catastrophic, a small leak rarely requires tearing off the entire roof system. To see where that money goes, it helps to think of your home’s roof like a heavy-duty raincoat. A raincoat keeps you dry, but if a single seam splits or a button pops off, water will find its way inside regardless of how high-quality the fabric is. Your roof works the same way; it is a protective system that relies on tight seals around chimneys, vents, and valleys. Most roof repair cost estimates cover the labour and materials needed to fix these specific “seams” rather than replacing the coat entirely. Ignoring a small breach in that system, however, changes the maths rapidly. Water that lingers for even 48 hours can begin to soak into insulation and wood, inviting mould and rot that act as hidden cost multipliers. A simple patch job can quickly balloon into a structural overhaul if left unattended. By moving from anxiety to action today, you are protecting your home’s structure and preventing a manageable repair from becoming a $10,000 replacement down the road. Why Your Quote Varies: The Three Big Pillars of Roofing Labour and Materials When looking at a roofing cost estimate, homeowners often expect the price of shingles to drive the total. In reality, materials usually account for only about 30 to 40 per cent of the bill. The bulk of your expense goes toward the skilled professionals doing the work, much like how a mechanic’s invoice is mostly hourly wages rather than the cost of a new timing belt. This labour-heavy split happens because roofing is physically demanding, high-risk work that requires specific insurance and safety training to prevent accidents. Safety isn’t just a concern for the workers; it directly impacts your wallet through the “pitch” factor. In industry terms, pitch simply refers to the steepness of the slope. If a roof is walkable—meaning a worker can stand on it without special harness equipment—the labour rates for professional roofing contractors remain standard. However, once that slope becomes too steep to walk on easily, the price often jumps by 20 to 30 per cent. This surcharge covers the extra time needed to set up scaffolding, secure safety harnesses, and move materials slowly up a near-vertical surface. Beyond just the angle of the roof, the specific conditions of your home can shift roofing repair rates significantly. Contractors look for “access obstacles” that slow down the crew and increase the difficulty. Your quote will likely reflect a higher labour charge if the team encounters: Once the crew navigates these obstacles, they often find the culprit isn’t the shingle itself, but the metal seals around your chimney and vents. The Flash Point: How Fixing Chimney and Vent Seals Prevents Attic Floods Water rarely soaks directly through a solid shingle; instead, it sneaks in where the roof changes shape. These sensitive joints rely on strips of metal, known as flashing, to bridge the gap between your roofing material and vertical structures. Because metal expands and contracts with the weather, these seals can eventually wiggle loose or rust, leading to an average cost of roof flashing repair generally falling between $200 and $500. It is similar to the zipper on a raincoat—the fabric might be fine, but if the seal fails, you still get wet. Another frequent offender is the rubber “boot” that surrounds the plumbing pipes sticking out of your roof. Over time, harsh UV rays crack this rubber gasket, creating a direct path for water to drip into your attic insulation. Fortunately, the roof vent leak repair cost is usually minimal compared to major structural work. You can typically expect the cost to replace damaged roof vent boots to stay under $150 per unit, making it one of the most affordable ways to stop a ceiling stain in its tracks. Problems become more complex when the issue involves the bricks themselves rather than just the metal seal. If the mortar between your chimney bricks is crumbling, a roofer cannot simply glue new metal down; they often need a mason to repair the structure first. Consequently, chimney masonry and flashing repair estimates can climb significantly, sometimes exceeding $1,000 depending on the damage. To catch these weak points early, keep an eye on these four critical zones: Once you know where to look, you can often confirm your suspicions without ever climbing a ladder by using a simple trick involving your garden hose. Spotting the Source: The Garden Hose Trick to Find Leaks Before the Pro Arrives Ceiling stains are often tricky liars; water usually runs down rafters or plywood before dripping, meaning the actual hole could be ten feet uphill from the damp spot on your drywall. Contractors often charge a minimum diagnostic fee just to locate the problem, adding roughly $150 to your final bill before they even lift a hammer. By performing early leak detection yourself, you skip this “discovery phase” and provide the roofer with the exact location of the failure, keeping more money in your pocket. This
How To Get a Roof Certification In New Jersey
If you’re a homeowner in New Jersey, ensuring the integrity of your roof is crucial. Not only does a sound roof protect your home from the elements, but it also provides peace of mind and can increase your property value. One way to certify your roof’s condition is by obtaining a roof certification. In this article, we’ll explore what a roof certification is, why it’s important, and the steps to obtain one in New Jersey. Before diving into the process, let’s clarify what a roof certification entails. A roof certification is a professional assessment of your roof’s condition. Typically conducted by licensed roofing contractors, this certification provides an estimate of the roof’s lifespan and its ability to withstand environmental factors. Why You Need a Roof Certification A roof certification is particularly important if you’re planning to sell your home. Buyers often seek this assurance to avoid unforeseen repairs. Even if you’re not selling, it’s a proactive way to maintain your property. Key benefits include: Steps to Obtain a Roof Certification in New Jersey Now that you know why a roof certification is important, let’s discuss how to get one in New Jersey. Step 1: Find a Qualified Roofing Contractor The first step is to locate a qualified roofing contractor. Look for a licensed professional with a good reputation. Companies like Deluxe Construction NJ are known for their expertise in roof inspections and certifications. Tips for Choosing a Contractor Step 2: Schedule a Roof Inspection Once you’ve selected a contractor, schedule a roof inspection. The contractor will assess various aspects of your roof, including: Step 3: Review the Inspection Report After the inspection, the contractor will provide a detailed report. This document outlines the roof’s condition, any necessary repairs, and an estimate of its remaining lifespan. Review this report carefully. Common Findings in Roof Inspections Step 4: Make Necessary Repairs If the inspection reveals issues, you’ll need to address them before obtaining certification. Discuss repair options with your contractor. They can guide you through the process and offer solutions that fit your budget. Step 5: Obtain the Roof Certification Once repairs are complete, and the roof meets all standards, the contractor will issue a roof certification. This document typically includes: Maintaining Your Roof Certification To maintain your roof certification, regular maintenance is key. Here are some tips to prolong the life of your roof: Conclusion Obtaining a roof certification in New Jersey is a straightforward process that provides significant benefits. Whether you’re selling your home or simply ensuring its upkeep, a roof certification is a wise investment. By following these steps and working with reputable contractors like Deluxe Construction NJ, you can ensure your roof remains in top condition. Remember, a well-maintained roof is not only about protection but also about enhancing your home’s value and appeal. So, take the necessary steps today to secure a roof certification and enjoy peace of mind knowing your home is safeguarded.
DIY Roof Repair: What New Jersey Residents Need
When it comes to maintaining your home, the roof is one of the most critical components. It protects you from harsh weather conditions and adds value to your property. The roof is your home’s first line of defense against nature’s elements, providing insulation and structural integrity. Whether you’re dealing with a minor leak or considering a complete roof replacement, understanding the basics of roof repair can save you time and money. This guide is tailored for New Jersey residents who want to tackle roof repair projects themselves or are looking to hire the best roofing companies in NJ. By understanding the region-specific challenges, you can make informed decisions that ensure the longevity and durability of your roof. Before diving into repairs, it’s essential to identify the common roofing issues specific to New Jersey’s climate. The state experiences a range of weather conditions, from hot summers to cold winters, making your roof susceptible to various types of damage. Understanding these unique challenges can help you anticipate problems and address them proactively. Moreover, knowing the typical wear and tear factors in New Jersey can guide you in choosing the right materials and repair strategies to withstand local weather patterns. Common Roof Issues in New Jersey DIY Roof Repair Basics While some roof repairs are straightforward and can be done by a handy homeowner, others might require professional intervention. Knowing the limits of what you can safely and effectively handle is crucial to avoid further damage. Here are the basic DIY repairs you might consider: Fixing Roof Leaks Repairing Shingle Damage Cleaning Gutters When to Call the Professionals While DIY repairs can address minor issues, some situations require professional expertise. Knowing when to call New Jersey roofers can save you from expensive repairs down the line. Professional roofers have the experience and tools necessary to diagnose and fix complex issues efficiently. Signs You Need a Professional Choosing the Best Roofing Company in New Jersey Selecting the right roofing company can be daunting with so many options available. A reliable contractor can make a significant difference in the quality and longevity of your roof repairs. Here are some tips to help you choose the best roofing companies in NJ: Research and Recommendations Verify Credentials Request Quotes Roof Maintenance Tips Regular maintenance can extend the life of your roof and prevent costly repairs. Consistent care not only preserves the roof’s integrity but also enhances your home’s overall value and curb appeal. Here are some tips to keep your roof in top condition: Seasonal Inspections Regular Cleaning Professional Maintenance Conclusion Whether you’re a DIY enthusiast or prefer leaving it to the experts, understanding the basics of roof repair and maintenance is crucial for New Jersey residents. By identifying potential issues early and choosing the right NJ roofers, you can ensure your home remains safe and secure. Regular maintenance and timely repairs are essential for prolonging your roof’s lifespan and maintaining your property’s value. Remember, when in doubt, calling in the best roofing company in New Jersey can save you time, stress, and money in the long run. With the right approach, your roof can withstand the test of time and weather, keeping your home protected for years to come. Prioritizing your roof’s health ensures a safe and comfortable living environment for you and your family.