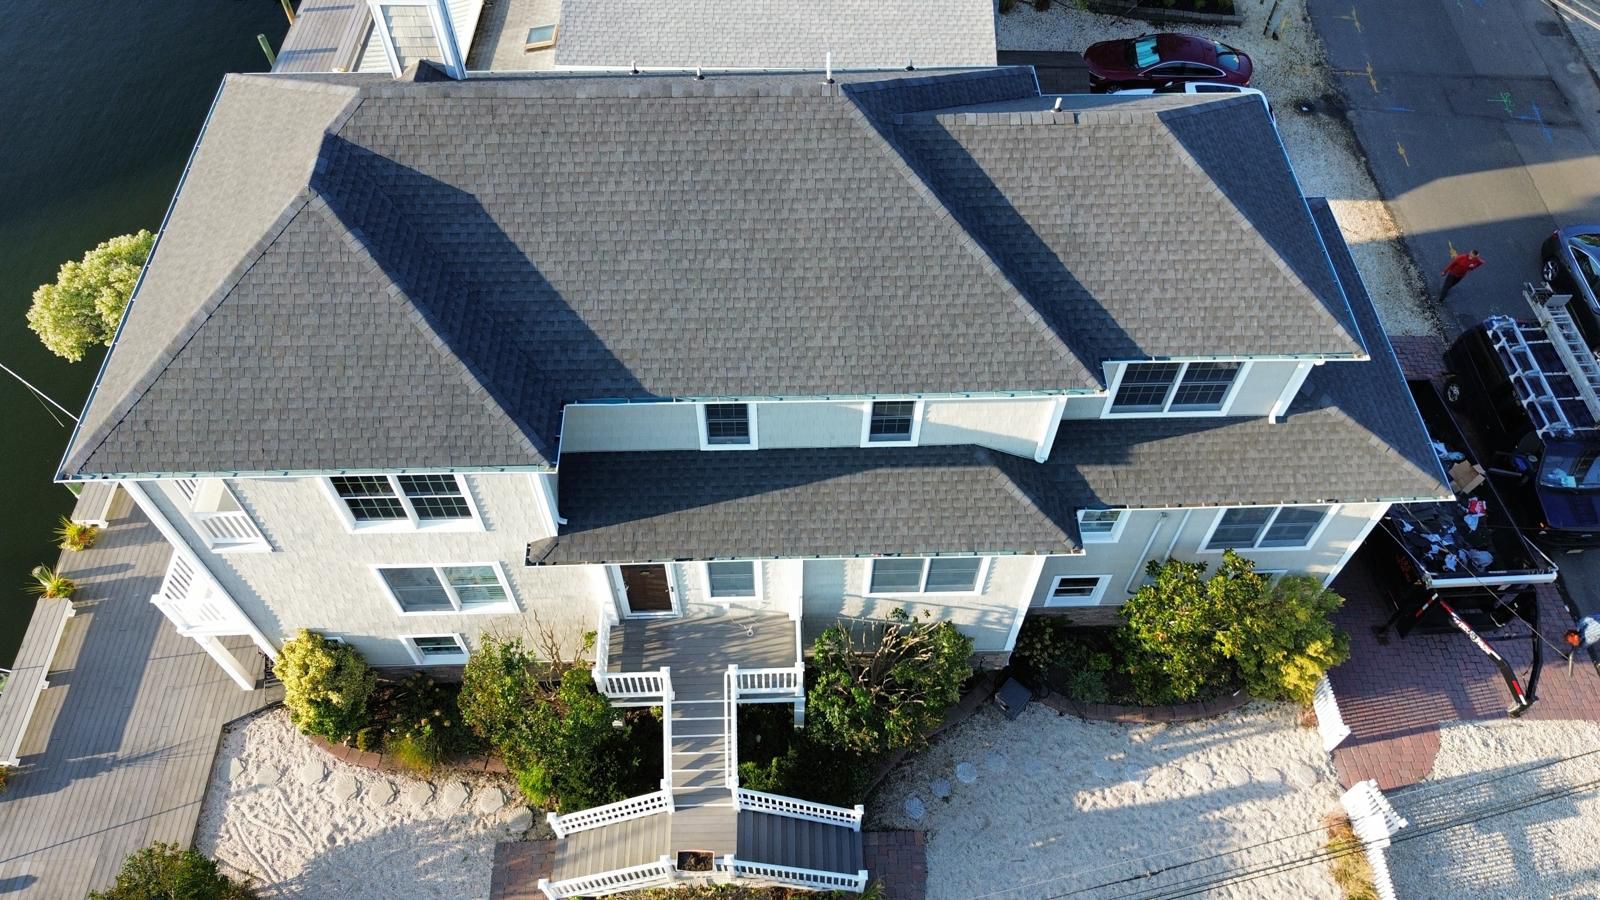
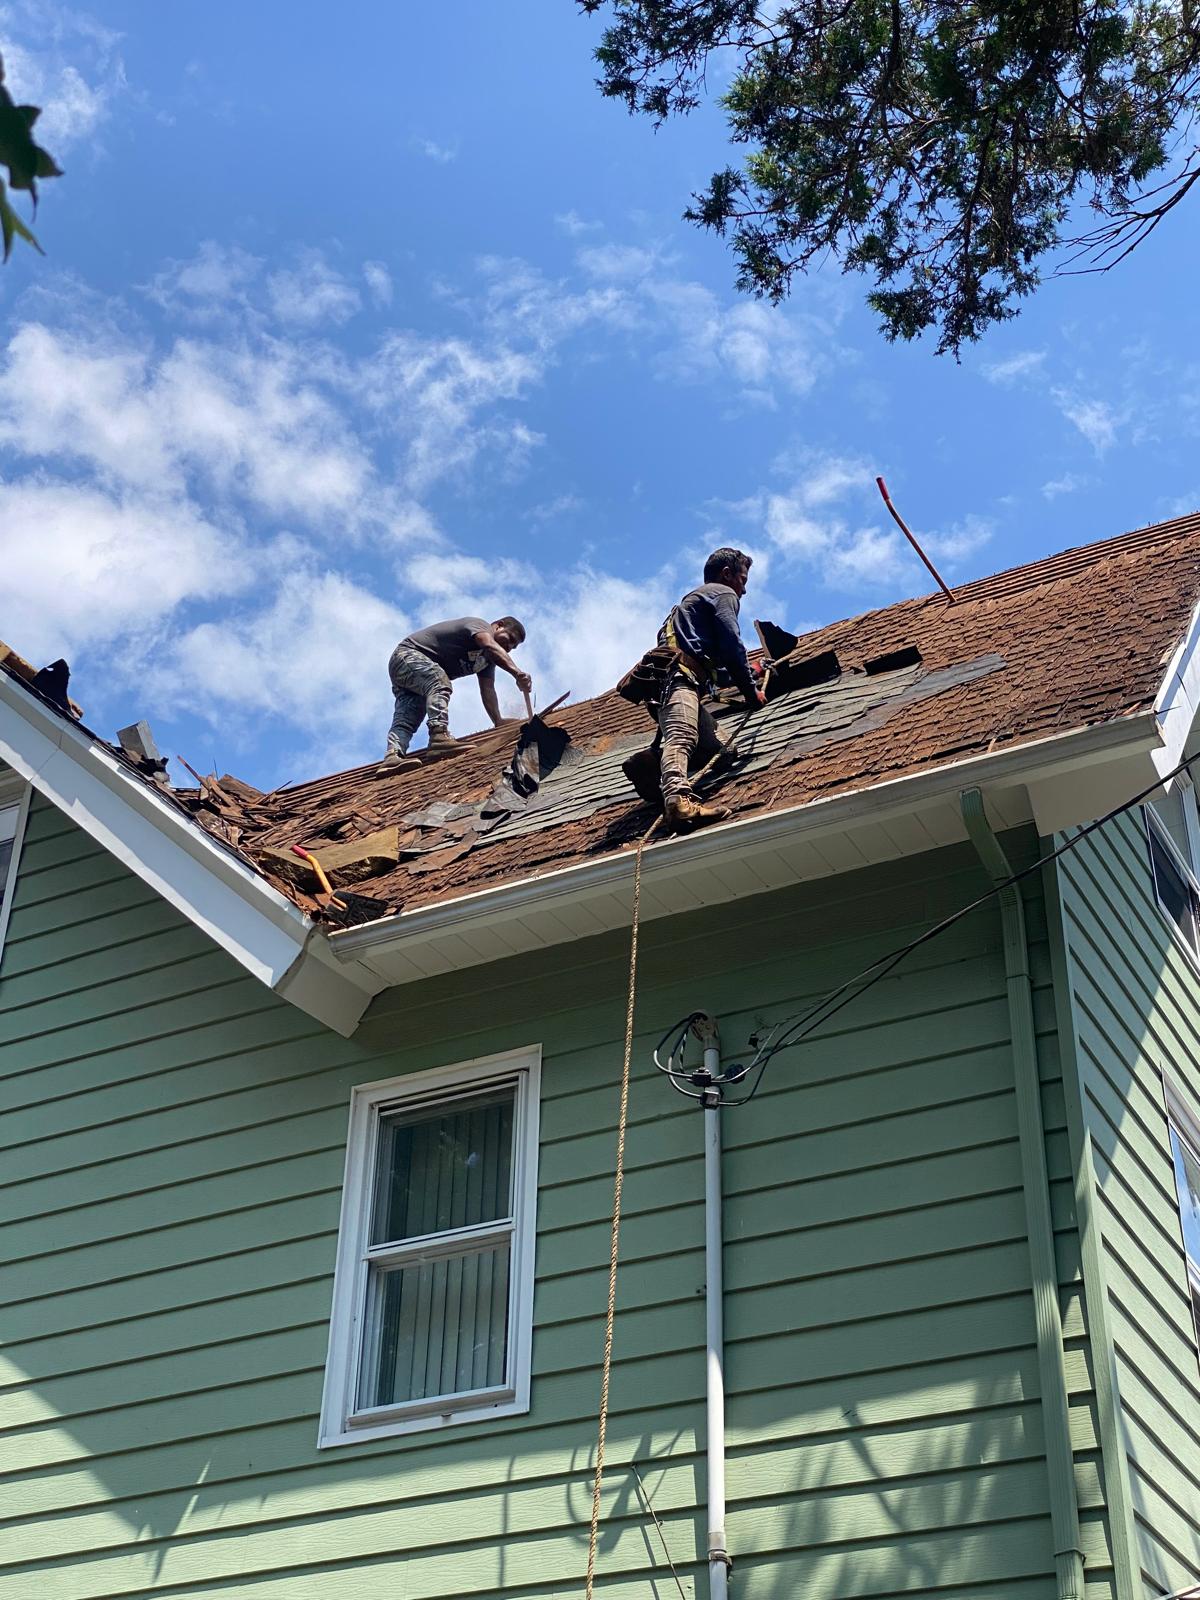
When you’re planning a roof replacement or major roof repair, the estimate is more than a price on paper. It is the first real test of whether a contractor is organized, transparent, and prepared to protect your home or building. A clear estimate helps you understand what work will be done, which materials will be used, how the property will be protected, and what happens if unexpected issues are found after the old roofing is removed. A rushed or confusing estimate can lead to budget surprises, project delays, warranty issues, and repairs that do not solve the real problem. For homeowners and property managers comparing contractors, knowing the common red flags roof estimate shoppers should watch for can make the difference between a smooth project and an expensive headache. Below are practical roofing estimate tips and key Red Flags When Getting a Roof Estimate to help you evaluate proposals with confidence, especially if you are considering roof replacement in New Jersey, where weather, building conditions, and local property types can all affect the scope of work. Why the Roof Estimate Matters So Much A roof estimate should do more than tell you the total cost. It should explain the project. A dependable contractor uses the estimating process to inspect your roof, understand your concerns, identify visible problems, and recommend the right solution. For example, a simple leak may require targeted roof repair if the rest of the roof is in good condition. On the other hand, widespread shingle deterioration, recurring leaks, soft decking, failing flashing, or poor ventilation may point toward a full replacement. The estimate should make that reasoning clear. A strong roofing estimate usually helps answer questions such as: If an estimate leaves you with more questions than answers, that does not automatically mean the contractor is dishonest. But it does mean you should slow down, ask for clarification, and avoid signing until the details are in writing. Red Flag: The Contractor Gives a Price Without a Real Inspection One of the biggest warning signs is a contractor who gives a firm price without properly inspecting the roof. A quick glance from the driveway is rarely enough to understand the condition of a roofing system. A professional inspection may include checking visible roof surfaces, valleys, flashing, gutters, chimney areas, skylights, roof penetrations, attic ventilation, and signs of water intrusion. Depending on the property, the contractor may also look for sagging areas, damaged decking, aging underlayment, or previous poor repairs. If someone offers an unusually confident quote without asking questions or looking carefully, the estimate may be based on guesswork. Guesswork can lead to change orders later, especially if damaged wood, improper flashing, or ventilation problems are discovered after work begins. A better approach is to work with a contractor who explains what they inspected and why the recommended scope makes sense. Red Flag: The Estimate Is Vague or Only Lists a Lump Sum A vague estimate might say something like “replace roof” followed by a single total price. That is not enough detail for a major exterior project. Your estimate should clearly outline what is included. While every contractor formats proposals differently, you should be able to understand the main components of the job. A complete estimate may include: If the proposal does not specify materials, quantities, roof areas, or installation details, you cannot make a fair comparison with another bid. A lower price may simply mean that important items are missing. Red Flag: The Price Is Much Lower Than Every Other Estimate Everyone wants a fair price. However, an estimate that is dramatically lower than the others should be reviewed carefully. Sometimes the cheapest bid excludes key parts of the project, uses lower-quality materials, skips important preparation steps, or relies on unclear labor practices. A low price can also become more expensive later if the contractor adds charges for items that should have been discussed upfront. For example, disposal, flashing, permits, wood replacement, or gutter protection may not be included. That does not mean the highest estimate is always the best. The goal is not to choose the most expensive contractor. The goal is to understand the value behind the number. Ask what is included, what is excluded, and how unexpected conditions are handled. When comparing roof replacement nj estimates, look for the proposal that gives you the clearest scope, strongest communication, appropriate materials, and a realistic price for the work described. Red Flag: High-Pressure Sales Tactics A roof is a major investment. You should not feel pressured to sign immediately, especially if you still have questions. Be cautious if a contractor says the price is only good “right now,” discourages you from getting other estimates, pushes financing before explaining the work, or insists that your roof is in urgent danger without showing evidence. Emergency roof repair situations do happen, but even then, a reputable contractor should explain the immediate concern and the recommended next step. Pressure tactics can make homeowners rush into agreements they do not fully understand. A reliable contractor gives you room to review the estimate, compare options, and ask questions. Red Flag: No Written Warranty Details Roofing warranties can be confusing because there may be both manufacturer warranties and contractor workmanship warranties. The estimate should make clear what warranty coverage is being offered and what the homeowner needs to do to maintain eligibility. A vague promise such as “you’re covered” is not enough. Ask for written details. Important warranty questions include: If a contractor avoids warranty questions or refuses to put warranty terms in writing, that is a serious red flag. Red Flag: Missing Insurance, License, or Business Information Before hiring any exterior contractor, ask for proof of insurance and basic business information. Roofing work involves ladders, tools, debris, and potential property risks. Proper insurance helps protect both the contractor and the property owner. You should also feel comfortable confirming that the company is established, reachable, and operating under a consistent business name. A professional estimate should include company contact information and
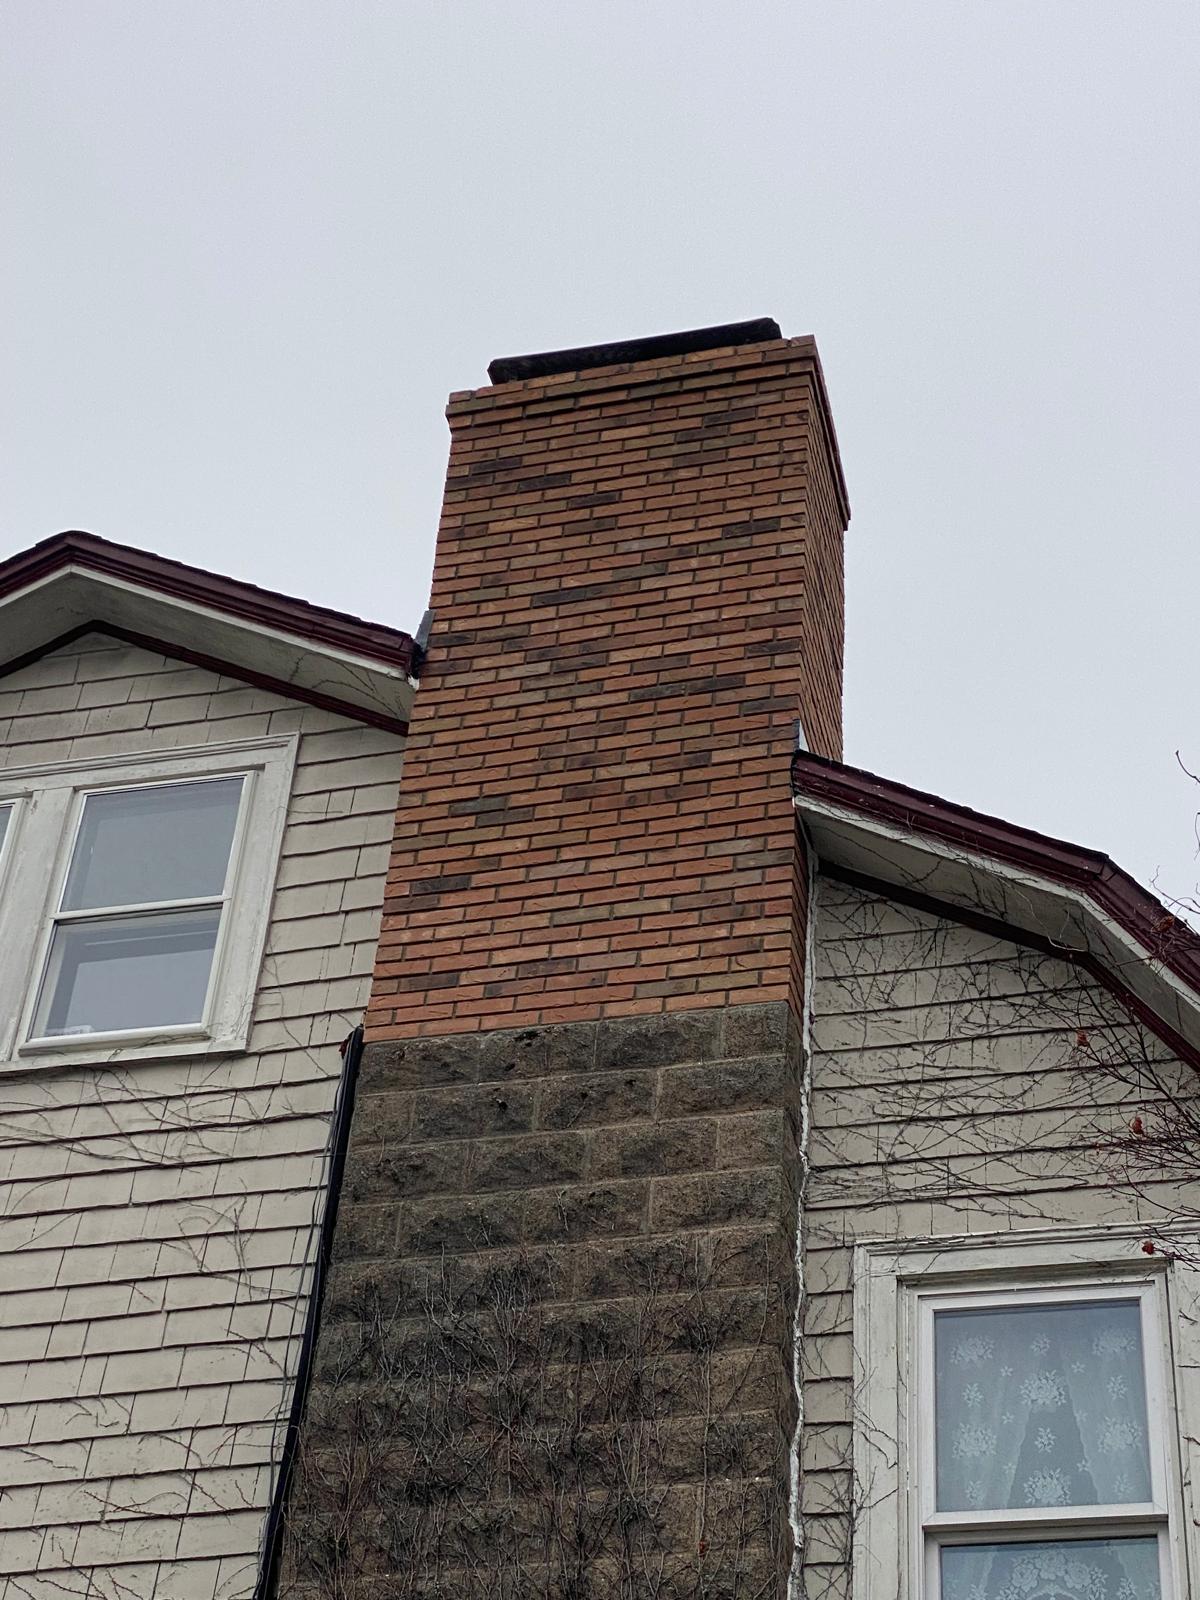
Chimney Flashing Repair In New Jersey
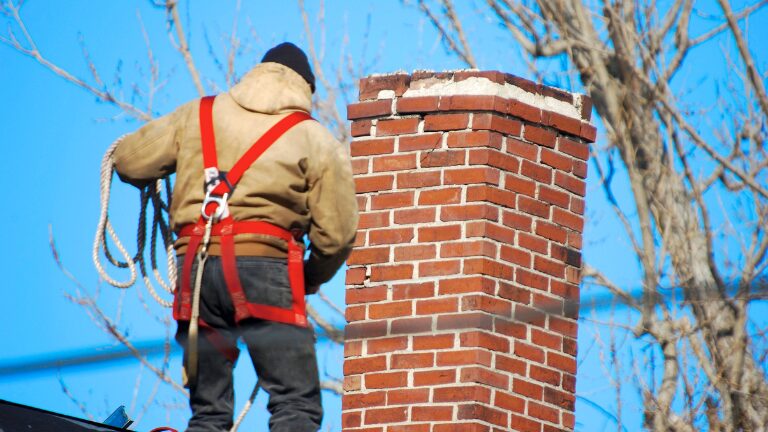
Chimney flashing is a crucial part of your home’s roofing system. It prevents water from seeping into your roof and causing damage. In New Jersey, the weather can be harsh, making chimney flashing repair essential. Many homeowners search for chimney flashing repair new jersey when leaks appear, and understanding local climate and building practices helps ensure durable results. Homeowners often overlook chimney maintenance, leading to costly repairs. Regular inspections and chimney maintenance NJ services can help identify issues early, saving you money in the long run. Signs of flashing problems include water stains, damp walls, and rust around the chimney. Addressing these issues promptly can prevent further damage. In some cases, timely chimney leak repair is also necessary to stop active water intrusion. Whether you choose DIY or professional repair, understanding the process is vital. This guide will help you navigate chimney flashing repair in New Jersey effectively. What Is Chimney Flashing and Why Is It Important? Chimney flashing is a metal barrier that seals the gap between your chimney and roof. Its primary role is to prevent water intrusion, which can damage your home’s structure. Without proper flashing, rain and melting snow can seep into the roof deck. Flashing serves as a protective shield, ensuring that water cannot bypass the chimney and leak into the home. This protection extends the lifespan of both the roof and chimney. Various materials are used for flashing, each with unique properties. Common choices include: Proper installation is crucial for flashing effectiveness. Layers of metal are strategically placed around the chimney base to create a watertight barrier. Any gaps can lead to leaks, making precise installation vital. Maintaining the integrity of chimney flashing is essential for your home’s safety and comfort. Properly installed and maintained flashing prevents moisture-related issues, such as mold growth and structural decay. Common Signs of Chimney Flashing Problems Identifying chimney flashing problems early can prevent extensive damage to your home. One common sign is water stains on your ceilings, often indicating leaks. Damp walls near your chimney might be another clue. This usually suggests water is seeping in due to faulty flashing. If you notice rust or visible cracks around the chimney’s base, it’s time for a closer inspection. These issues can quickly worsen if not addressed promptly. Look out for these common signs of flashing problems: Catch these signs early to avoid more serious issues. Regular inspections can help detect problems before they cause major structural damage. Taking swift action when these signs appear can protect your home from water damage and save money on repairs. If leaks are already present, consider chimney leak repair along with flashing upgrades to fully resolve moisture issues. Why Chimney Flashing Repair Is Essential in New Jersey New Jersey’s varied weather conditions can take a toll on your home’s structural components. Chimney flashing, in particular, is vulnerable to the state’s seasonal temperature swings. These conditions can lead to wear and tear, causing leaks if not properly maintained. Repairing chimney flashing in New Jersey is crucial for preventing water intrusion. Water damage can lead to mold growth and compromise your home’s integrity. Regular repairs and inspections can prevent these costly issues. Moreover, effective flashing repair can improve your home’s energy efficiency. Properly sealed flashing helps keep drafts at bay and retains heat, making heating systems more efficient. Consider these reasons why chimney flashing repair is essential: A proactive approach to chimney flashing repair ensures your home remains safe and comfortable. If your roof is aging or damaged, coordinating work with roof repair New Jersey specialists can help address related roofing issues at the same time. Don’t wait for issues to escalate before taking action. How to Inspect Chimney Flashing for Damage Regular inspection of your chimney flashing can help you catch problems early. Begin by visually examining the flashing from the ground using binoculars. Look for signs of rust, cracks, or any visible gaps that might indicate damage. If safe access is available, inspect the flashing closer while standing on the roof. Check for loose sections, missing materials, or signs of water pooling. Listen for any unusual sounds that might suggest materials are separating. Use this checklist when inspecting your chimney flashing: By maintaining a regular inspection schedule, you can prevent minor issues from becoming significant repairs. This proactive approach will save time and money in the long run. If you’re unsure, consult a professional to ensure a thorough evaluation. DIY vs. Professional Chimney Flashing Repair Deciding between DIY and professional repair depends on your skills and the problem’s complexity. For minor issues and if you’re handy, a DIY approach can be cost-effective. Basic repairs might involve resealing small gaps or tightening loose flashing. However, professional repair is recommended for complex or extensive damage. Experts have the training and tools to identify and fix issues safely. They can also address underlying problems that might be invisible to an untrained eye. Before attempting a DIY repair, consider these factors: Professional services offer peace of mind with warranties and guarantees. They ensure the job is done correctly the first time. For complex repairs, hiring experts is often a wise investment in your home’s longevity. Always weigh the risks and benefits before making a decision. If leaks are active or widespread, a professional can coordinate chimney leak repair with flashing replacement for a comprehensive fix. The Chimney Flashing Repair Process: Step by Step Repairing chimney flashing involves a detailed, methodical process to ensure long-lasting results. First, it’s important to assess the damage. An in-depth inspection is crucial to determine the extent of deterioration. The next step is to prepare the area around the chimney. This involves removing old, damaged flashing. Clearing debris and cleaning the surface ensures the new flashing adheres properly. Once the area is prepped, you can install the new flashing. This requires precision to create a watertight seal. Incorrectly installing new materials can lead to future issues. Here’s a summarized list of the steps: Finally, after installing, it’s crucial to check the work.
How Damaged Gutters Can Lead To Roof And Foundation Problems
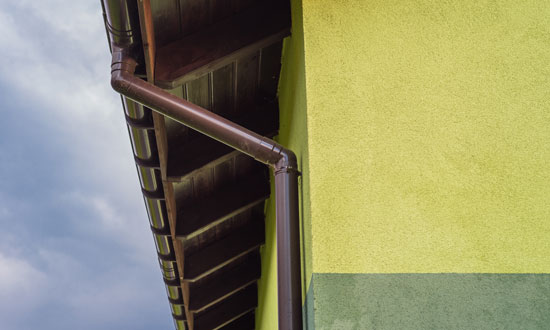
A gutter system may look like a simple strip of metal along the roofline, but it plays a major role in protecting your roof, siding, basement, landscaping, and foundation. When gutters crack, sag, clog, leak, or pull away from the fascia, rainwater stops moving where it should. Instead of being carried safely away from the property, water can spill behind the gutter, soak roof edges, erode soil, and pool around the foundation. How damaged gutters can lead to roof and foundation problems becomes clear when water is diverted in the wrong direction, increasing the risk of moisture intrusion, erosion, and structural stress. This guide walks you through how to identify damaged gutters, understand the risks, and decide whether gutter cleaning, gutter repair, or gutter replacement is the right next step. For property owners in New Jersey, Deluxe Construction NJ provides gutter inspection, repair, installation, and maintenance services for residential and commercial properties. (deluxeconstructionnj.com) Why damaged gutters create roof and foundation problems Your gutters are designed to collect runoff from the roof and direct it into downspouts that discharge water away from the building. When that system fails, water often finds the weakest nearby path. Common gutter issues can lead to: The good news is that most gutter problems are easier and less expensive to address when they are caught early. Step 1: Start with a safe ground-level gutter inspection Before climbing a ladder, walk around the property and inspect the gutter system from the ground. You can spot many warning signs without putting yourself at risk. Look for: If you see several of these issues, schedule a professional gutter inspection. Deluxe Construction NJ’s inspection process includes checking visible damage, debris, slope, securement, water flow, and repair recommendations. (deluxeconstructionnj.com) Step 2: Watch what happens during rainfall One of the easiest ways to identify clogged gutters, leaky gutters, and poor drainage is to observe the system during a steady rain. Stay safely on the ground and look for unusual water movement. Pay attention to: Overflow usually means one of three things: the gutter is clogged, the downspout is blocked, or the gutter pitch is incorrect. If water is escaping behind the gutter, the system may be loose, improperly flashed, or damaged at the roof edge. Step 3: Check for roof-related warning signs Damaged gutters often create roof problems gradually. By the time you notice an interior leak, moisture may already have affected the roof edge, decking, fascia, or insulation. Inspect for these roofline symptoms: If your gutters are broken, sagging, or clogged, do not assume the roof is unaffected. A roof and gutter system work together. Repairing damaged gutters may stop the water problem, but a contractor should also check whether the roofline has already been compromised. Step 4: Inspect the foundation and drainage area Foundation problems are not always caused by gutters, but damaged gutters can make water management around the home much worse. When downspouts fail or gutters overflow, roof runoff may collect exactly where you do not want it: at the base of the building. Walk the perimeter and look for: Downspout extensions should move water away from the structure, not release it directly beside the foundation. If you have damaged downspouts, missing elbows, or disconnected extensions, repair them quickly. Step 5: Clear clogged gutters before they cause more damage Gutter cleaning is one of the most important forms of gutter maintenance. Leaves, pine needles, roofing granules, seed pods, and small branches can collect inside the system and block water flow. Once water cannot drain, it may overflow, back up under roof edges, or add enough weight to pull gutters loose. If you clean gutters yourself, follow these safety basics: For multi-story properties, steep rooflines, commercial buildings, or severe clogs, hire a professional. Cleaning is helpful, but it will not solve gutter issues caused by cracks, loose hangers, poor pitch, storm impact, or improper installation. Step 6: Identify whether you need gutter repair or gutter replacement Not every damaged gutter system needs to be replaced. In many cases, targeted gutter repair can restore proper performance. However, if the system has widespread deterioration, replacement may be more cost-effective. Gutter repair may be enough when: Gutter replacement may be better when: If you are searching for how to repair damaged gutters, remember that simple fixes like resealing a seam are very different from correcting slope, replacing fascia, or addressing roof-edge water intrusion. When the problem affects the roof or foundation, a professional evaluation is the safer choice. Step 7: Address hail and storm damage quickly Hail damaged gutters can be more than a cosmetic issue. Dents may disrupt water flow, loosen hangers, crack sealant, or damage downspouts. Strong winds can also pull gutters away from the fascia or twist sections out of alignment. After a storm, check for: If your property is outside New Jersey, you may come across location-specific searches such as “hail damaged gutters repair Batavia IL” or “hail damaged gutters repair Elgin IL.” The same principle applies anywhere: choose a local, qualified contractor who understands regional weather and drainage needs. For New Jersey homeowners and businesses, Deluxe Construction NJ offers professional gutter services across the state. (deluxeconstructionnj.com) Step 8: Document damage for insurance purposes If your gutters were damaged by hail, wind, falling branches, or another storm event, documentation matters. Insurance coverage for storm damaged gutters depends on your policy, the cause of damage, and your insurer’s assessment. Do not assume every repair will be covered, and do not start major work before you understand the claims process. A practical documentation process includes: A contractor can identify damage and provide repair recommendations, but your insurance provider determines coverage. Step 9: Prevent future gutter issues with routine maintenance The best way to avoid roof and foundation damage is to keep the gutter system working year-round. Regular gutter maintenance helps prevent clogs, leaks, and drainage failures before they turn into costly problems. Use this simple maintenance routine: Deluxe Construction NJ provides gutter inspection services that include checking clogs, alignment,
Do You Need A Permit For Roofing In NJ?
Whether you are dealing with a sudden leak after a heavy storm or planning a complete exterior upgrade, installing a new roof is a significant investment. Among the decisions regarding shingle colors and contractor selection, one crucial legal question always arises: Do you need a permit for roofing in NJ? Navigating the world of new jersey permits can seem daunting, but understanding the local regulations ensures your project is safe, compliant, and structurally sound. Let’s dive into everything you need to know about securing a nj roofing permit, the costs involved, and the risks of skipping this vital step. Ordinary Maintenance vs. Minor Work: Understanding the Guidelines Under the NJ Department of Community Affairs roofing guidelines , not every roofing job requires a trip to the local building department. It is highly important to understand the difference between roof repair and replacement permits. The state dictates clear NJ Uniform Construction Code roofing exemptions . If you are simply replacing a few blown-off shingles or patching a minor leak, this usually falls under “ordinary maintenance.” Ordinary maintenance does not require a nj building permit. However, if you are tearing off old layers of roofing, replacing plywood decking, or doing a complete installation, the state classifies this as “minor work” or standard construction. Understanding ordinary maintenance vs minor work roofing NJ is the key to knowing your obligations. Simply put: do you need a permit for roofing in nj if you are replacing the whole roof? Yes, almost always. Navigating the Application Process If your project requires approval, you’ll need to follow the residential roofing permit application process NJ . Here are the basic steps to obtain a building permit for a new roof: Many homeowners want to stay updated on their project’s status. If you are wondering in nj how to check for a roofing permit online, many municipal building departments now use the SDL Portal (Spatial Data Logic) or a town-specific digital system where you can search your address to view permit statuses in real-time. Costs and Fees: Budgeting for Your Permit A common question homeowners ask is, how much is a roofing permit in nj? The answer is that the cost of roofing permit in nj varies from town to town. So, exactly how much does a NJ roofing permit cost? Most towns calculate municipal building department permit fees NJ based on the estimated cost of the construction project. For example, a town might charge $30 to $50 for every $1,000 of estimated work, plus a state training fee. On average, you can expect to pay anywhere from $150 to $400 for a standard residential roofing permit nj. Who is Responsible for the Paperwork? Who is responsible for pulling roofing permits in New Jersey? While a homeowner is legally allowed to apply for their own permit, as long as they meet permit requirements nj (often by signing an affidavit stating they are doing the work themselves), it is standard practice for your hired contractor to handle this. When you hire a professional roofer in NJ , they should pull the permit under their company’s name. This ensures they take legal responsibility for the work meeting local building codes. Before signing a contract, always verify NJ home improvement contractor registration requirements . By law, contractors must be registered with the Division of Consumer Affairs to perform roofing services NJ. If you are looking for a reliable partner to handle your project from start to finish, including navigating all roofing permits nj , look no further than Deluxe Construction NJ . They are experts in new jersey roofing and ensure every project is strictly up to code. Town-Specific Rules and Zoning While the Uniform Construction Code provides a statewide standard, you must also pay attention to NJ town specific roofing codes and zoning. Historic districts, HOA guidelines, and specific local ordinances can impact your project. For example, do you need a roofing permit in palmyra nj? Yes, Palmyra, like other local boroughs, enforces the state UCC guidelines but may also have specific requirements for dumpsters on the street or working hours. Always check with your local construction office before a single shingle is removed. The Risks of Skipping the Permit Trying to save a few hundred dollars by dodging the permit process is a dangerous gamble. The penalties for roofing without a permit in NJ are steep. You could face: Furthermore, unpermitted work can haunt you down the road. If a severe storm damages your house, home insurance coverage for unpermitted roof work is often denied by claims adjusters. When it comes time to sell your home, buyers’ inspectors will check municipal records; unpermitted work can delay or completely derail a real estate transaction. The Final Step: Inspections and Approvals Once your contractor finishes the job, the permit process isn’t quite over. The local building department will require a final inspection. The final inspection checklist for NJ roof replacement typically ensures that: Once the inspector is satisfied, the municipality will issue a Certificate of Approval for NJ roofing projects. This certificate is your official proof that the roof was installed safely, legally, and up to state standards. Keep this document safe with your home records! Conclusion Tackling a roof replacement shouldn’t be a stressful legal headache. By understanding the rules, trusting registered professionals, and ensuring your project passes final inspection, you protect your home and your wallet. If you want a seamless experience where every detail—from pulling permits to pounding the final nail—is handled by seasoned experts, visit deluxeconstructionnj.com . With Deluxe Construction NJ, you get unparalleled craftsmanship and peace of mind knowing your roof is built to last and fully compliant with state regulations. Frequently Asked Questions Question: Do I need a permit to work on my roof in New Jersey? Short answer: Usually yes for replacements, no for small repairs. Under the NJ Uniform Construction Code, small fixes like replacing a few shingles or patching a minor leak are “ordinary maintenance” and typically do not require a permit.
Top-rated siding repair services in New Jersey area
Living in New Jersey means experiencing a dynamic climate. From the harsh, freezing blizzards of winter to the intense, humid storms of summer, your home’s exterior is constantly on the front lines, taking a beating from Mother Nature. Your siding is not just a cosmetic feature; it is a vital shield that protects your home’s structural integrity and insulates your living spaces. Because of this constant exposure, finding the Top-rated siding repair services in New Jersey area is an absolute necessity for homeowners who want to protect their most significant investment. Whether you are dealing with minor cosmetic flaws or severe weather-related destruction, timely home siding repair ensures your house remains safe, energy-efficient, and visually appealing. Ignoring small issues can lead to extensive water damage, mold growth, and compromised framing. In this comprehensive guide, we will explore everything you need to know about maintaining your home’s exterior, from identifying early warning signs to hiring the best local experts. Recognizing the Signs: When Do You Need Home Siding Repair? Before you start searching for siding repair services, it helps to know exactly what you are looking at. Being proactive is the best way to save money and avoid catastrophic structural issues. Understanding how to identify storm damage on siding can make the difference between a simple patch job and a massive renovation. Make it a habit to walk around the perimeter of your house twice a year—preferably in the spring and fall—and after any major severe weather event. Keep an eye out for these critical red flags: Siding Repair vs Full Replacement Guide A common dilemma for many homeowners is deciding whether to patch a localized problem or invest in a completely fresh exterior. A reliable Siding repair vs full replacement guide ultimately boils down to three factors: the extent of the damage, the age of your current cladding, and your budget. When to Repair: If the damage is isolated—such as a fallen tree branch breaking a few panels on one side of the house—calling new jersey siding repair services makes the most financial sense. For instance, the Vinyl siding crack repair cost NJ homeowners typically face is highly affordable, usually requiring only an hour or two of labor and a few replacement panels. The biggest challenge with partial repairs is aesthetics. Sunlight fades exterior materials over time, but experienced contractors have access to resources and techniques for matching weathered siding colors so the patched area blends seamlessly with the rest of your home. When to Replace: If your cladding is over 20 years old, suffering from widespread dry rot, or requiring constant patching, it is likely time for a complete siding replacement nj. Additionally, if you notice your heating and cooling bills steadily climbing, your old exterior might be failing to insulate your home properly. Investing in modern, energy-efficient siding not only solves the immediate structural problems but also provides a massive boost to your home’s curb appeal and market value. Addressing Specific Materials and Exterior Repair Services Different architectural styles and cladding materials require unique approaches when it comes to exterior repair services. A one-size-fits-all approach does not work in exterior home maintenance. Vinyl and Aluminum Vinyl is incredibly popular in New Jersey due to its cost-effectiveness, but extreme temperature fluctuations can cause it to expand, contract, and eventually crack. Aluminum, while highly durable, is prone to impact damage from hail or errant baseballs. Fortunately, skilled technicians utilize specialized aluminum siding dent removal techniques to carefully pop out dents and restore the panel’s shape without needing to replace the entire section. Wood and Cedar Shake Wood offers a timeless, rustic aesthetic but is vulnerable to moisture, rot, and pests. After a severe coastal storm or nor’easter, you might require emergency cedar shake restoration to replace blown-off shingles and prevent water from penetrating your home’s protective envelope. Prompt treatment and sealing of wood elements are crucial to extending their lifespan. Fiber Cement Known for its incredible durability and fire resistance, fiber cement is a fantastic investment. However, it still requires basic upkeep to look its best. Following a proper James Hardie siding maintenance guide—which generally includes gentle low-pressure annual washing, inspecting the caulking joints every few years, and keeping shrubs trimmed away from the walls—will keep your fiber cement pristine for decades. Best Siding Materials for New Jersey Climate If your repairs eventually lead to a broader upgrade, you need to select the Best siding materials for New Jersey climate. As you compare new jersey siding options, prioritize durability, energy performance, and code compliance. The Northeast’s fluctuating weather patterns demand highly resilient materials: Whenever you are considering a material upgrade or extensive siding installation nj, it is crucial to ensure that the products and the installation methods meet all local regulations. Your chosen professional must be intimately familiar with NJ building codes for exterior cladding, ensuring proper installation of vapor barriers, flashing, and wind-load securing methods. Choosing the Right Siding Contractors NJ Has to Offer The quality and longevity of your repair are only as good as the team performing the work. When looking for siding contractors nj, you should never just hire the first name that pops up in a search engine. Vetting your contractor ensures you get top-tier craftsmanship and fair pricing. Here is how to find the best: Spotlight on Excellence: Deluxe Construction NJ When it comes to top-tier workmanship and reliable customer service, Deluxe Construction NJ stands out as a premier provider in the state. With years of hands-on experience managing everything from minor storm damage fixes to full-scale exterior installations, they are a deeply trusted name in nj home improvement. Whether you are searching for localized siding repair services new jersey homeowners consistently recommend, or you need comprehensive exterior renovations, their dedicated team delivers outstanding results. They understand the specific nuances of local weather patterns and only use high-quality, durable materials built to last. For a detailed consultation, an honest estimate, and to view a portfolio of their completed local projects, you can visit
Can A City Demand A Roof Replacement In New Jersey
Imagine opening your mailbox to find a formal letter from your local township, stating that your home’s roof is in violation of municipal codes and must be replaced. For many homeowners, this scenario induces immediate panic. You might wonder: Can a city demand a roof replacement in New Jersey? The short answer is yes. Under specific circumstances, usually related to severe safety hazards or extreme blight, your local government absolutely has the legal authority to force you to fix or entirely replace your roof. Understanding how and why a municipality can mandate a home repair is essential for protecting your property, your wallet, and your peace of mind. Let’s dive into the legalities, the process, and what you should do if you find yourself facing a city-mandated roof replacement. Understanding Municipal Power and Property Codes To understand why a city can demand repairs on privately owned property, you first need to understand the hierarchy of building and maintenance codes. In New Jersey, local governments are responsible for ensuring that all buildings within their borders are safe for habitation and do not pose a threat to neighbors or the public. This is overseen through New Jersey property maintenance standards, which dictate the minimum conditions a property must meet to be considered safe and habitable. The Role of Code Enforcement The broad municipal code enforcement officer authority allows local officials to inspect properties—often triggered by neighbor complaints, routine neighborhood surveys, or visible damage from the street. If an officer determines your roof is severely deteriorating, they can issue a citation. While there is sometimes confusion between municipal vs state building codes, the breakdown is generally straightforward: the state sets the standard (like the NJ Uniform Construction Code), but your local municipality enforces property maintenance and dictates when an existing structure has fallen below those legal thresholds. When Does a Repair Become a Mandated Replacement? A code enforcement officer won’t demand a brand-new roof just because your shingles look a bit faded. The city usually steps in only when there are significant safety concerns. Structural Safety and Imminent Hazards If your roof is visibly sagging, missing large sections of shingles after a storm, or actively leaking to the point of structural decay, the city will intervene based on structural integrity public safety standards. If a building official determines the roof is in danger of collapsing, they may issue an imminent hazard building designation. This is the most severe level of violation. The unsafe structure notice consequences that follow can include immediate eviction of the residents (condemning the property) until the structural issues are fully resolved. Legal Criteria for Replacement You might be wondering if you can simply patch the roof to satisfy the city. The roof repair versus replacement legal criteria usually depend on the extent of the damage. According to most building codes, if more than 25% to 30% of the roof’s surface area is damaged or needs to be removed to fix the underlying structure, a patch job is no longer legally permitted. You will be required to pursue a full roof replacement in New Jersey. The Inspection and Permitting Process Once you receive a notice from the city, the clock starts ticking. Navigating the municipal bureaucracy requires specific steps. 1. Professional Assessment The city’s notice will likely mandate a local ordinance roof inspection to formally document the extent of the damage. You will need to hire a licensed professional for a thorough roof inspection nj to assess the decking, underlayment, and structural supports. 2. Obtaining the Right Permits You cannot simply start tearing off shingles. You must navigate the re-roofing permit process NJ. Your contractor will need to submit plans to the township’s building department to prove NJ Uniform Construction Code compliance. 3. Emergency Situations If your roof was destroyed by a severe storm or tree fall, and you have been given an imminent hazard notice, the standard permit waiting period could leave your home exposed. In these cases, your contractor can apply for an emergency construction permit NJ, which expedites the paperwork so that a full roof replacement nj can begin almost immediately to protect the structure. Special Circumstances: Historic Districts If you live in one of New Jersey’s many historic towns—such as Cape May, Morristown, or parts of Montclair—you have an extra layer of bureaucracy to navigate. Homes located in historic districts are subject to strict historical society roofing guidelines NJ. If the city mandates a roof replacement, you cannot simply throw up the cheapest materials available. The historic commission may require you to use specific materials, such as slate, wood shake, or architecturally approved simulated shingles, to maintain the historical aesthetic of the neighborhood. What to Do If You Receive a Municipal Order Ignoring a letter from code enforcement is the worst thing you can do. The fines for roofing violations NJ can accumulate daily, quickly turning into thousands of dollars in liens against your property. Here is an actionable checklist if you receive a mandate: Financial Relief and Insurance Coverage A forced roof replacement is an unexpected and massive expense. Understanding the new jersey roof replacement cost is crucial. While the roof replacement cost new jersey homeowners face varies based on the size of the home, pitch of the roof, and chosen materials, it generally ranges from $7,000 to over $15,000. Does Insurance Cover Mandated Replacements? If your roof’s deterioration was caused by a covered peril (like a sudden windstorm or fallen tree), your standard homeowner’s insurance should cover the new jersey roof replacement. However, if the city demands upgrades to meet current building codes that didn’t exist when your home was built, you will need specific home insurance coverage for mandated repairs, known as “Ordinance or Law Coverage.” Check your policy to see if you have this rider; it can save you thousands in unexpected code-upgrade costs. State and Local Assistance Programs If the replacement is mandated due to age and wear and tear, insurance will not cover it. However, low-income homeowners, veterans, or
How To Calculate Roof Pitch
Calculating roof pitch is a crucial skill for homeowners and builders alike. It determines the steepness of a roof, impacting both function and aesthetics. Understanding roof pitch—and the related roof angle calculation—helps in selecting the right materials and ensuring proper drainage. It also affects the overall design and structural integrity of a building. Whether you’re planning a DIY project or working with professionals, knowing how to calculate roof pitch is essential. This guide will walk you through the process, from measuring to calculating in degrees. If you’ve wondered how to calculate roof pitch in degrees (also phrased as how to calculate the pitch of a roof in degrees or how to calculate a roof pitch in degrees), you’ll find clear steps below. You’ll also learn how to calculate roof area with pitch—often searched as how to calculate area of roof with pitch. By the end, you’ll have the knowledge to tackle any roofing project with confidence. What Is Roof Pitch and Why Does It Matter? Roof pitch refers to the steepness or slope of a roof. It is usually expressed as a ratio of the vertical rise to the horizontal run. For example, a 4/12 pitch means the roof rises four inches for every 12 inches of horizontal distance. Understanding roof pitch is vital for several reasons. A steeper pitch can improve water drainage and help prevent water buildup. It is also crucial in areas prone to heavy snow or rain, as it can reduce the risk of leaks and structural issues. Roof pitch has aesthetic implications as well. It influences the style and visual appeal of a building. Different architectural styles often call for specific roof pitches, impacting the overall design. Here are key aspects affected by roof pitch: Overall, knowing the roof pitch helps in choosing materials, estimating costs, and planning construction efficiently. When determining roof pitch, precise roof slope measurement supports safer design and better material estimates. Tools and Safety Tips for Measuring Roof Pitch Measuring roof pitch requires the right tools to ensure accuracy. Essential tools include a tape measure, a level, and a protractor or angle finder. A smartphone app can also be handy for quick calculations and measurements. These tools help in measuring roof slope accurately. Working on a roof can be dangerous. Safety should always be a top priority when measuring roof pitch. Ensure you wear proper footwear with good grip. It’s advisable to use a harness or secure rope to prevent falls. Additionally, working with a partner adds an extra layer of security. Here are some safety tips to consider: Always prioritize safety to avoid accidents and ensure successful roof measurements. Methods for Measuring Roof Pitch Determining roof pitch can be done using several methods. Depending on accessibility and safety, choose the best method suited to your needs. Each method helps you calculate roof slope and supports determining roof pitch for your project. The most common method is measuring directly from the roof surface. It involves using a level and tape measure to calculate rise over run. This technique is simple and effective for most roofs. Another approach is measuring from the attic. This method is excellent for avoiding outdoor work when the roof is unsafe. It involves calculating the angle internally without stepping onto the roof. List of methods: Each method has its pros and cons, ensuring adaptability for different situations. Choose based on the level of safety and ease of access to your roof Measuring Roof Pitch from the Roof Surface Measuring directly from the roof surface is straightforward. Begin by placing a level horizontally on the roof. Ensure one end touches the roof surface. Next, measure 12 inches (one foot) along the level from where it touches the roof. Measure vertically from that point to the roof. This measurement represents the vertical rise over the 12-inch horizontal run. Steps for surface measurement: This method provides a quick and clear calculation of your roof pitch ratio. Measuring Roof Pitch from the Attic If climbing on the roof isn’t feasible, measure from the attic instead. This indoor method involves less risk and requires minimal tools. Access your attic space to begin the process. Place a level against a rafter in the attic. Ensure the level is horizontal and measure 12 inches along it. From the end point, measure vertically to the bottom of the rafter. This gives you the rise over a fixed horizontal distance. Steps to measure from the attic: This approach is ideal for those prioritizing safety and ease of access. How to Calculate Roof Pitch as a Ratio Calculating roof pitch as a ratio is a simple yet critical step. This ratio reveals the slope by comparing rise to run. Typically, it’s expressed in the form “x/12.” To determine this ratio, measure 12 inches across horizontally. Then, measure the vertical rise from the end of that 12-inch span. The vertical measurement is your numerator in the ratio. Using the basic roof pitch formula—pitch = rise/run—helps standardize your results. For example, if the rise is 6 inches, the pitch is a 6/12. This means for every 12 inches of horizontal distance, the roof rises 6 inches vertically. Steps to calculate: This simple calculation helps in evaluating roof slope for various projects. How to Calculate Roof Pitch in Degrees If you’ve wondered how to calculate roof pitch in degrees or how to calculate the pitch of a roof in degrees, the process uses basic trigonometry. This roof angle calculation translates the pitch ratio into a degree angle. First, calculate the rise over run as a decimal. For example, a 6/12 pitch converts to 0.5. Use a scientific calculator or a trigonometry app to perform this calculation efficiently. Next, apply the formula: degrees = arctan(rise/run). For the example of 6/12 or 0.5, the calculation returns approximately 26.57 degrees. Knowing this angle assists in the selection and installation of materials. This is also how to calculate a roof pitch in degrees with a calculator. Many apps let you quickly calculate roof
Chimney Liner Installation in NJ by Deluxe Construction NJ
You see your chimney every day from the driveway, but what happens behind those bricks could be putting your family at risk. In historic New Jersey neighborhoods, decades of humid summers and winter freeze-thaw cycles quietly destroy masonry from the inside. According to residential building experts, this hidden decay compromises your chimney liner—the protective sleeve acting like a straw inside the brick column. This inner pathway, known as the flue, performs a critical job. It manages the draft, which is the heat-driven upward airflow that pulls dangerous exhaust safely outside. When old clay tiles crack, the system loses its seal, allowing carbon monoxide to leak indoors instead of venting through the roof. Routine safety inspections frequently reveal these dangerous breaches before homeowners notice anything wrong. Modernizing your system stops this deterioration completely. A stainless steel upgrade creates a seamless exhaust path that protects your masonry while offering significant cost-saving benefits through improved heating efficiency. By choosing Deluxe Construction NJ for the chimney liner installation New Jersey homeowners trust, you secure lasting peace of mind. We specialize in chimney liner installation New Jersey projects and provide chimney installation services designed for durable, stainless steel protection from a trusted chimney liner NJ partner. Why Your Chimney Liner is the “Straw” That Saves Your Home Think of your chimney liner as a protective sleeve hidden inside the brickwork—like a plastic straw inside a heavy glass. When you learn how a chimney works, you realize this sleeve is the critical piece directing exhaust from your furnace or fireplace safely outdoors. Bare masonry simply cannot handle modern heating demands on its own. When gas appliances burn fuel, they create highly acidic condensation that clings to the inside of your flue, slowly eating away at the brick and causing dangerous mortar corrosion. Properly sized liners prevent this damage by keeping exhaust gases hot so they rise quickly and exit your home efficiently. Without this airtight seal, exhaust cools too fast and sinks back into your living room, ultimately leading to expensive chimney repairs in NJ or emergency chimney liner services. Catching this invisible deterioration early is the best way to protect both your family and your property value. 5 Warning Signs Your NJ Chimney Liner is Failing Spotting a deteriorating flue rarely requires a ladder. You can easily perform a five-minute DIY visual inspection right from your living room by carefully checking the firebox and the chimney base. Knowing how to tell if a chimney liner is damaged starts with separating normal, superficial wear from a genuine structural emergency. Armed with a flashlight, look for these five clear indicators of failure: While slightly dirty bricks might just be cosmetic, these physical signs of a cracked chimney flue mean toxic gases could easily enter your living spaces. Ignoring them often necessitates emergency NJ chimney repair or costly chimney repair NJ when winter arrives. Stainless Steel vs. Clay Tile: Making the Right Choice for the Garden State Faced with a damaged flue, you must navigate the debate of stainless steel vs clay tile chimney liners . While builders once defaulted to inexpensive clay, the long-term ROI strongly favors steel. Factoring in complex labor, the upfront chimney installation cost for a metal retrofit rivals basic masonry repair, but the performance differences are stark: When upgrading to a high-efficiency gas furnace, this material shift becomes mandatory. Modern systems produce cooler exhaust that creates highly acidic condensation inside the flue. Without protection, this acid eats through clay mortar like tooth decay. To meet these stringent fuel-specific venting requirements, experts install 316L Grade Stainless liners. This unique alloy actively resists chemical corrosion, ensuring toxic moisture stays safely contained rather than bleeding into your walls. People constantly ask how long do stainless steel chimney liners last, and that half-century durability essentially guarantees a permanent fix. Upgrading to 316L metal stops structural decay while efficiently handling modern fuels. However, picking the right material is only the first step; ensuring your installation is legally compliant is equally critical. Navigating New Jersey Building Codes and Safety Standards Upgrading your venting system requires strictly following New Jersey building codes for flue relining. Under the state’s Uniform Construction Code (NJ UCC Subchapter 12), altering your chimney demands a municipal permit before work begins. Bypassing township approval risks significant headaches, ranging from immediately voided homeowner’s insurance policies to delayed closings when you eventually try to sell the property. To pass mandatory chimney liner safety inspections for NJ homeowners, the installed materials must meet strict testing benchmarks. Local inspectors specifically look for UL listed chimney liner specifications, such as the widely recognized UL 1777 standard. This critical safety certification proves the new metal sleeve can safely contain a severe chimney fire without transferring lethal heat through the masonry to your home’s wooden framing, satisfying both municipal codes and insurance carrier guidelines. Because local regulations dictate exact sizing algorithms and strict insulation protocols, unpermitted DIY attempts usually end in costly code violations. Hiring certified specialists removes this regulatory guesswork entirely, ensuring your home stays fully compliant and thoroughly protected. The Professional Installation Path: What to Expect from Deluxe Construction NJ Knowing the code requirements is one thing, but watching a professional crew actually install chimney liner systems brings the process to life. Once safety gear is secured for roof access, technicians begin by thoroughly sweeping the interior masonry to remove old soot and debris, creating a clean pathway for the new materials. While severely deteriorated structures occasionally require a poured cast-in-place chimney liner process, most modern upgrades utilize the highly efficient “pull-through” method. A standard installation timeline follows these specific steps: Before packing up, the technicians perform a definitive “smoke test,” sending harmless vapor up the flue to visually prove there are zero leaks into your living space. With your family’s safety fully secured, the final consideration involves the project’s budget. Our chimney liner services are delivered by certified specialists from Deluxe Construction NJ. Breaking Down the Cost of Chimney Relining in NJ Understanding the average cost of chimney relining
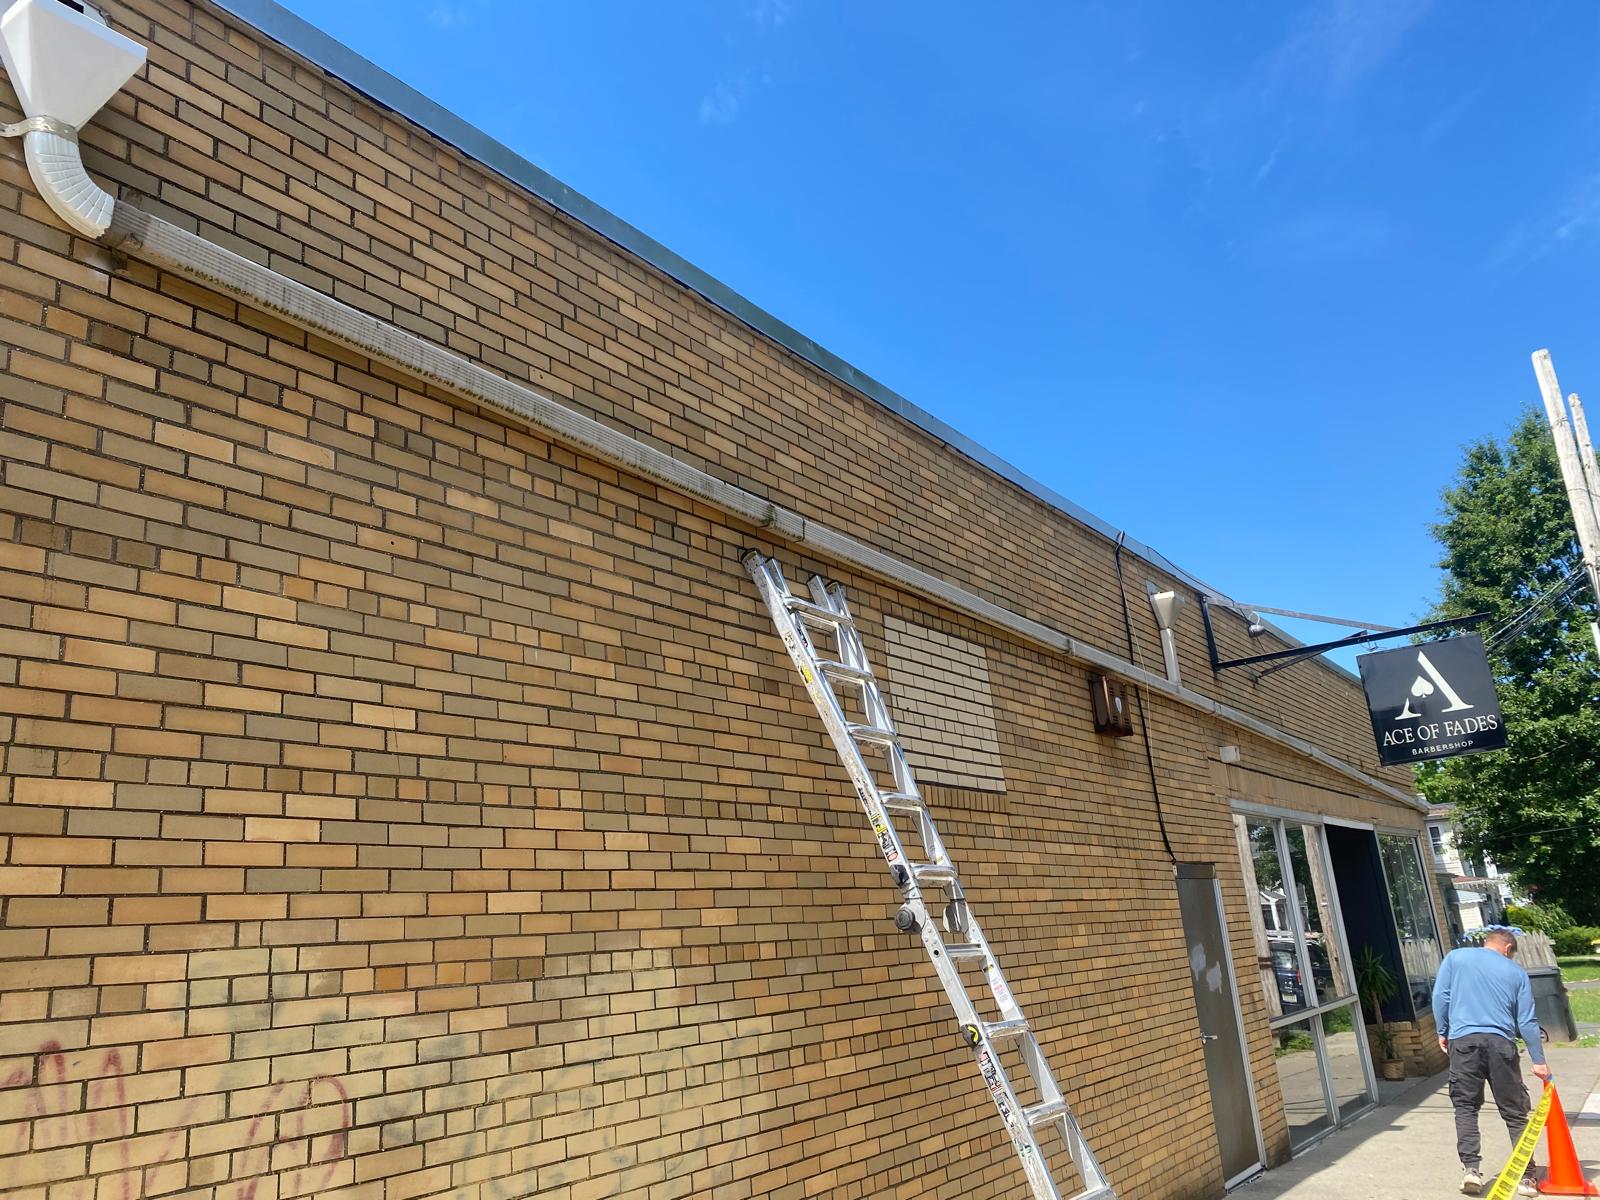
Commercial Gutter Installation NJ by Deluxe Construction NJ
Whether it’s the heavy snows that fall on Sussex County, or the vicious nor’easters we see all too often on the Shore, even garden-variety drainage is unable to keep up with our local weather. Most of the people who own property are aware that basic troughs disperse water from a building, but few property owners are aware of the huge difference in drainage volume between residential and commercial buildings. To ensure good performance and code compliance, you can choose to have Commercial gutter installation NJ, NJ’s local professional in the field, Commercial gutters NJ and Gutter installation NJ, install the gutter for you. Imagine your customers having to wade through a wall of runoff to get into your storefront! A good commercial gutter installation project in NJ takes heavy-gauge materials seriously because of this “Waterfall Effect” that will affect entryways, as well as creating serious slip liability. The engineering data shows that normal residential aluminum will bend under the weight of wet snow in New Jersey and thicker commercial channels are a must if there is a possibility of structural failure. The correct drainage size is a structural safety net for your foundation. Facility managers can make long-term ROI with systems that are built to capture thousands of gallons of quick runoff, while complying with New Jersey building codes for commercial drainage. By upgrading your NJ commercial roofing infrastructure, you can be sure that your building will continue to be shielded from severe weather all year long. The 7-Inch Advantage: Why Size Is the First Line of Defense Against Nor’easters If you’ve watched a summer storm turn your storefront into a waterfall, you’ve witnessed pitch-to-volume failure. While you likely know your roof’s total square footage, its steepness (pitch) dictates how violently water rushes toward the edge. Fast-moving rain easily overshoots standard residential troughs. For Garden State businesses, choosing between 6-inch vs 7-inch seamless gutters comes down to capturing that sheer volume before it destroys your foundation. Comparing capacity differences makes the necessary upgrade obvious: Calculating commercial downspout sizing requires simple math: plan for one square inch of downspout per 100 square feet of roof area. Proper downspout placement prevents winter liability. Emptying a massive system onto a shaded sidewalk guarantees a dangerous ice slick by January. Instead, water must be routed safely away from foot traffic. Yet, even perfectly sized drainage will fail if the trough itself buckles under heavy snow loads. This makes your next decision crucial: choosing the correct material gauge to survive New Jersey’s freeze-thaw cycle. Aluminum vs. Steel: Choosing Material Gauge for NJ’s Freeze-Thaw Cycle Surviving a New Jersey winter requires more than just high water capacity; your commercial system must physically hold the crushing weight of trapped snow and ice. Think of material thickness, or “gauge,” like the difference between a flimsy soda can and a rigid soup tin. Upgrading from a residential thickness to a commercial grade is vital for preventing structural damage. The benefits of heavy-gauge aluminum gutters include resisting the severe bending and tearing caused when solid ice pulls at your building’s fascia during our brutal freeze-thaw cycles. Beyond material thickness, eliminating structural weak points is critical because metal systems expand in 90-degree summer heat and shrink during deep winter freezes. This constant thermal expansion will eventually rip traditional pieced-together seams apart. At Deluxe Construction NJ, we advise property managers that continuous, seamless fabrication is completely non-negotiable for commercial properties looking to prevent ice-driven leaks. Selecting the right metal ultimately depends on your budget and required lifespan: With durable metal secured, the next priority is shaping it to match your building’s specific architectural and volumetric needs. Box Gutters vs. K-Style: Matching System Geometry to Your Building’s Architecture While thickness ensures durability, a gutter’s physical shape determines its total water capacity. K-style profiles mimic exterior crown molding, blending seamlessly into New Jersey retail storefronts where aesthetics matter. Conversely, sprawling commercial spaces need pure volume over visual appeal. This is where heavy-duty box gutter systems for warehouses excel. Their deep, rectangular geometry holds massive amounts of water, acting as a critical catch basin when summer storms dump localized floods onto large, flat properties. Managing that tremendous runoff requires keeping those wide channels completely clear. Since flat structures lack a steep pitch, simple debris clogs rapidly cause dangerous pooling. Pairing a high-volume box profile with a reliable industrial leaf guard system installation guarantees water continuously moves toward the downspout. Maintaining this unobstructed flow is your strongest tool for ice dam prevention for flat roofs, stopping trapped freezing water from backing up under the roofing membrane and destroying interior assets. Even perfectly shaped troughs must account for natural thermal movement. Because local weather brings extreme temperature swings, long metal runs constantly expand and contract. To prevent this shifting from buckling the system, contractors integrate expansion joints—specialized flexible sections allowing the metal to “breathe” safely. Properly installing these pressure-relief components highlights the necessity of strict adherence to regional building codes and safety standards. Staying Within the Lines: Navigating NJ Building Codes and Safety Standards Navigating local regulations is just as critical as choosing the right materials, especially when a single code violation can trigger hefty municipal fines. Complying with New Jersey commercial property exterior maintenance requirements ensures your drainage system manages water responsibly, preventing overflow from flooding neighboring businesses or freezing on public sidewalks. Before beginning any commercial gutter installation NJ project, local inspectors expect your building to meet four essential benchmarks: Beyond the physical hardware, the team working on your roof introduces a separate layer of business liability. Hiring crews that strictly adhere to OSHA safety standards for gutter contractors protects your company from devastating lawsuits if an accident occurs on your property. Always verify your professionals carry comprehensive workers’ compensation and liability insurance before they set up a single ladder. Once safely secured, keeping your fully compliant system operational becomes the ongoing priority. Protecting Your Investment: A 4-Season Maintenance Schedule for Garden State Property Managers New Jersey weather is relentless, shifting violently from blistering

Chimney Liner Edison Nj
When New Jersey winter with its brisk winds fills your home, the fireplace and heating system of your home becomes the core of your comfort. Nonetheless, a hero that is frequently disregarded helps to keep your home safe and warm: the chimney liner. Whether your wood fire is warm or your gas or oil furnace is heating your house, it is an issue of efficiency and even safety to have your chimney lined properly. When you require a chimney liner of the highest quality chimney liner edison nj, you will need a team that will not only take into account the structural soundness of your home but also consider the stringent local codes of safety. Deluxe Construction NJ, being a leading Chimney Contractor in Edison, offers full Chimney Services in Edison to keep your family and property safe. In this full guide we are going to discover all you need to know about chimney lining, chimney maintenance and how to ensure the exhaust systems of your home are functioning at an optimum. What is a Chimney Liner and Why Do You Need One? A chimney liner, or flue liner, is a protective conduit installed inside your chimney. It serves three critical functions: A failing liner poses severe risks. One of the most critical reasons for immediate chimney liner installation is preventing carbon monoxide entry from cracked flues. Carbon monoxide is an odorless, deadly gas. If your liner is compromised, this gas can easily seep into your living spaces instead of venting safely outdoors. Crucial Signs You Need a Replacement How do you know it is time to call a professional for chimney repair edison? Be on the lookout for these common signs of chimney liner deterioration: If you notice any of these signs, investing in Chimney Lining Services in Edison, NJ is not just a home improvement; it is a life-saving necessity. Material Matters: Selecting the Right Liner When considering Chimney Lining, the material you choose makes a massive difference in longevity and performance. Homeowners often weigh the pros and cons of a stainless steel chimney liner vs clay tile. Historically, clay tiles were the standard. While affordable, they are highly susceptible to cracking under rapid temperature changes. Today, Stainless Steel Chimney Lining is the gold standard for residential properties. Not only does stainless steel handle extreme temperatures seamlessly, but it also resists corrosion from gas and oil byproducts. When opting for metal liners, a knowledgeable Contractor will discuss rigid vs flexible chimney liner durability. Rigid liners offer incredible strength and are perfect for straight, unbending chimney flues. Flexible liners, however, are highly durable and can navigate chimneys with offsets or unusual shapes, ensuring a Seamless Installation. Another excellent option provided by experts is Thermocrete Chimney Lining. This is an advanced ceramic coating sprayed onto the interior walls of your chimney. It is a fantastic alternative for sealing cracks and repairing damaged terra cotta chimney pipes without having to tear down the existing masonry or drastically reduce the flue’s internal size. Specialized Liners for Different Heating Systems Many homeowners mistakenly believe chimneys are only for wood-burning fireplaces. In reality, your furnace and boiler rely heavily on proper venting. Gas and Oil Heating Systems Modern, high-efficiency gas furnaces produce significant moisture during the combustion process. Proper furnace flue liner installation for gas heat ensures this acidic moisture doesn’t eat away at your chimney’s brickwork. Similarly, understanding why chimney liners are necessary for oil boilers is crucial. Oil combustion creates heavy soot and sulfuric acid. If these byproducts coat an unlined masonry chimney, they will rapidly destroy the mortar joints, leading to a structural collapse. A properly sized stainless steel liner safely expels these corrosive gases. Wood Stoves For those who rely on wood heat, adhering to strict wood stove chimney liner safety requirements is non-negotiable. Wood stoves burn extremely hot and produce creosote—a highly flammable byproduct. A high-quality liner keeps the flue temperatures consistent, which reduces creosote buildup and significantly lowers the risk of a devastating chimney fire. Sizing and Efficiency: The Hidden Mechanics One of the most complex parts of relining is knowing how to choose the right chimney flue size. A flue that is too small won’t allow appliances to vent properly, leading to smoke backup and carbon monoxide risks. A flue that is too large allows the exhaust gases to cool too rapidly, leading to sluggish drafts and heavy condensation. The impact of improper flue sizing on heating efficiency can be felt in your wallet. When your heating system has to work harder to push exhaust out of an incorrectly sized chimney, your utility bills skyrocket. By relying on Chimney liner services in Edison, NJ by Deluxe Construction NJ, you guarantee that all thermodynamic calculations are handled correctly. Our experts always utilize materials that highlight the benefits of UL-listed chimney lining systems, meaning your new liner has been rigorously tested to the highest safety standards by Underwriters Laboratories. Comprehensive Chimney Care by Deluxe Construction NJ While the internal lining is vital, total chimney health requires a holistic approach. As a trusted local expert, Deluxe Construction NJ offers more than just Chimney Lining in Edison. We provide a full suite of services to ensure your home remains safe and dry. Moisture Control and Masonry Protection Water is the enemy of masonry. A small leak can quickly freeze, expand, and destroy your chimney from the inside out. We specialize in Chimney Leak Repair and comprehensive Chimney Waterproofing to lock out Central New Jersey’s harsh rain and snow. Crowns, Caps, and Covers To stop water, debris, and local wildlife from entering your flue, proper top-sealing is required. We offer professional Chimney Cap Replacement for traditional setups, as well as Chimney Chase Cover installations for prefabricated chimney systems. Fireplace and Structural Repair Whether you need minor aesthetic touch-ups or major structural overhauls, our Fireplace Repair and general Chimney Repair services ensure that your hearth remains the beautiful, functional focal point of your living room. Routine chimney maintenance nj is the best